
Many users may encounter the "unable to find output device" issue while using Windows 11. This article will introduce several effective methods to help you quickly restore audio functionality.
Method 1: Check Audio Device Connection
Ensure that the power of your headphones or speakers is turned on; Bluetooth devices should be charged and functioning properly.
For wired devices, check that the audio cable is plugged into the correct port (usually the green audio output port).
If multiple audio devices are connected, try plugging them into different ports to confirm they are working properly.
Verify that the Bluetooth device is paired with Windows 11 by going to "Settings" > "Bluetooth & other devices" to check the connection status.
Method 2: Update Audio Drivers
Outdated or incompatible audio drivers can prevent devices from being recognized. Updating the drivers usually resolves this issue. It's recommended to use Driver Sentry to automatically detect driver updates, saving time and avoiding the risk of downloading incorrect drivers.
Click the download button to get the latest version of Driver Sentry, install it, and then open the software to click "Scan".
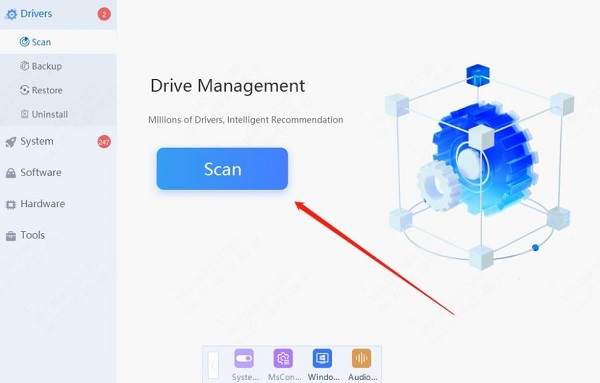
Once scanning is complete, it will show which drivers are uninstalled or need updates. Find the audio driver in the results list and click the "Update" button.
After updating, it's advisable to restart your computer to ensure the updated drivers work correctly.
Method 3: Check Audio Settings
Right-click the volume icon on the taskbar and select "Sound settings".
In the "Output" section, ensure the audio device you want to use is selected.
Make sure the volume slider is not muted and adjust it to an appropriate level.
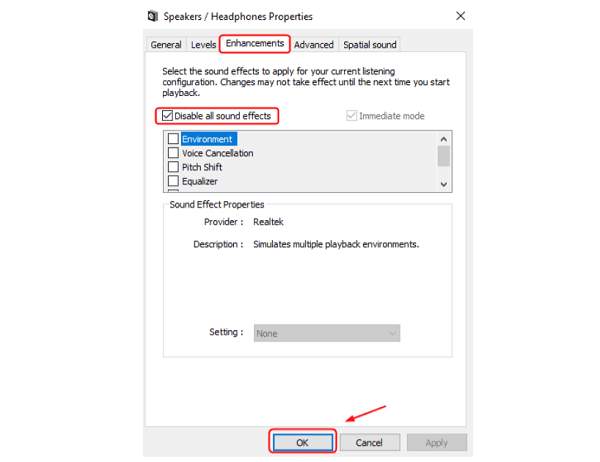
Click "Device properties" and check the "Enhancements" tab for any enabled enhancements that may affect audio output.
Method 4: Reset Audio Services
Press "Windows + R", type "services.msc", and press Enter.
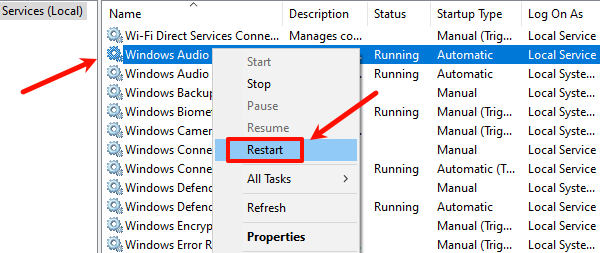
Scroll down the list of services to find "Windows Audio".
Right-click "Windows Audio" and select "Restart". If the service is not running, choose "Start".
Ensure that the "Windows Audio Endpoint Builder" service is also running if it relies on the audio service.
Method 5: Run Audio Troubleshooter
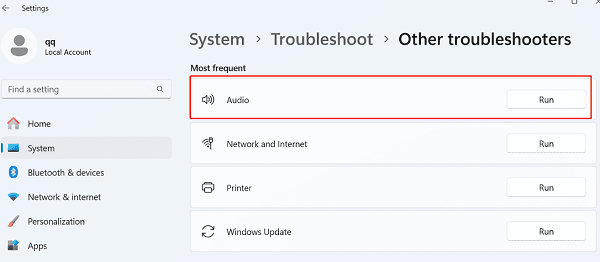
Click the "Start" button, select "Settings", and find "System".
Click "Troubleshoot", then find "Other troubleshooters".
Select "Audio" and click "Run".
Follow the prompts to run the troubleshooter, which will automatically detect and attempt to fix the problem.
Method 6: Check Windows Updates
Click the "Start" button, select "Settings", and choose "Update & Security".
In the "Windows Update" section, click "Check for updates". The system will automatically search for available updates.
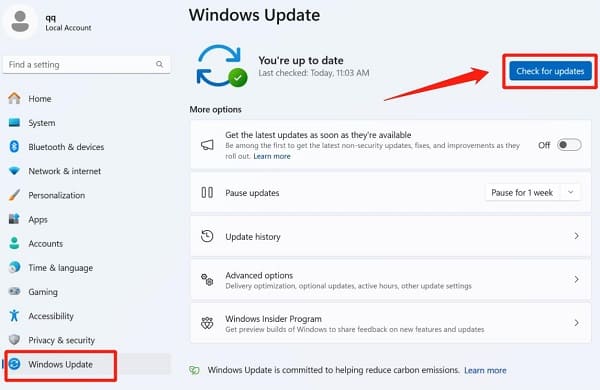
If updates are found, click "Download and install", then follow the prompts to restart your computer to apply the updates.
By following these steps, you can effectively resolve the issue of Windows 11 being unable to find the output device. If you still have questions, it is advisable to contact professional technical support for further assistance.
See also:
How to Fix Ethernet Not Working Issues
8 Ways to Fix Network Latency Issues