
An unresponsive wireless network card is a common problem that can prevent you from connecting to Wi-Fi and disrupt your daily activities. This guide offers detailed steps to quickly resolve the issue and restore your network connection.
1. Check Basic Settings
1). The wireless network card may have been accidentally disabled. Check your laptop's wireless switch or function key (usually marked with a Wi-Fi symbol) to make sure it's on. Also, check the wireless connection status in the "Network and Sharing Center".
2). Restarting the router and computer can sometimes fix the issue. Turn off the router, wait 30 seconds, then turn it back on. After that, restart your computer to refresh the network connection.
2. Update the Wireless Network Card Driver
Outdated, corrupted, or incompatible wireless network card drivers can cause unresponsive issues. It is recommended to use Driver Sentry to automatically detect and update drivers, saving time and avoiding the risk of downloading or installing the wrong drivers.
Click the download button to get the latest version of Driver Sentry. After installation, open the software and click "Scan".
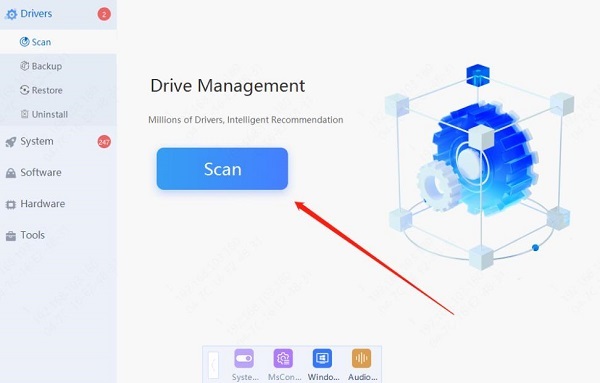
Once the scan is complete, it will show which drivers are not installed or need updates. Find the wireless network card driver in the list and click the "Update" button.
After updating, it is recommended to restart your computer to ensure the updated driver is fully effective.
3. Check Firewall Settings
Press the Windows + R keys, type "control", and press Enter to open the Control Panel.
Select "System and Security", then click "Windows Defender Firewall".
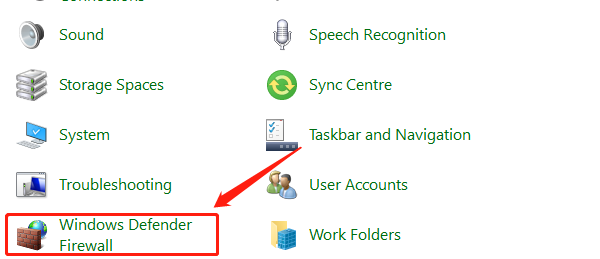
In the left menu, click "Allow an app or feature through Windows Defender Firewall".
Click "Change settings" (you may need administrative privileges).
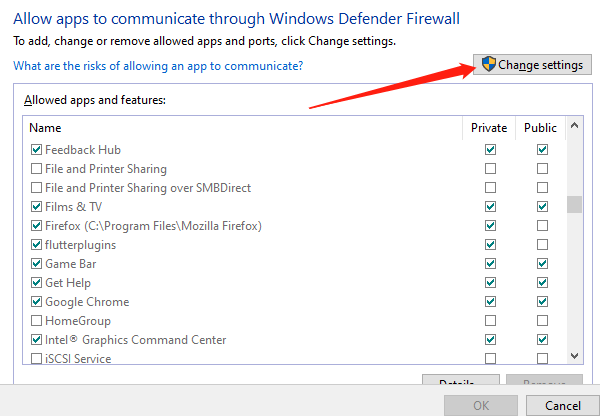
Find network-related programs and ensure the "Private" and "Public" boxes are checked.
If not found, click "Allow another app" to add them manually.
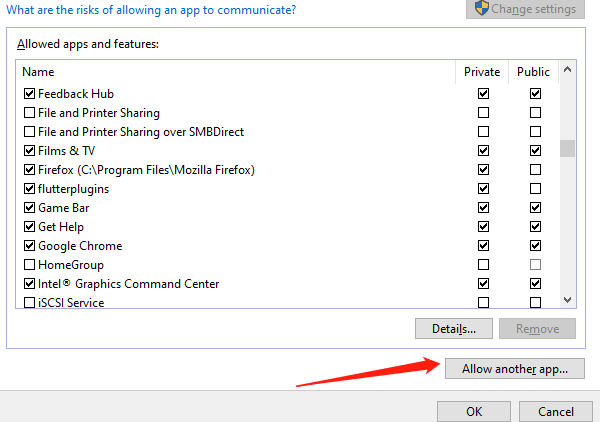
Click "OK" to save and close the settings.
4. Adjust Network Settings
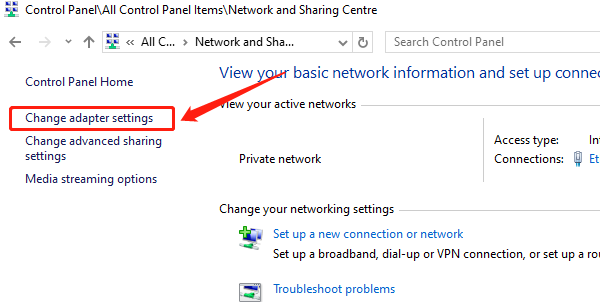
Open the "Control Panel" and go to "Network and Sharing Center".
Click "Change adapter settings", right-click on the wireless network connection, and select "Properties".
Check the IPv4 and IPv6 settings to ensure they are configured correctly.
Select "Obtain an IP address automatically" and "Obtain DNS server address automatically".
Save the changes and restart your computer to apply the new settings.
5. Optimize Wi-Fi Signal
Place the router in a central location in your home, away from walls and obstructions.
Avoid placing the router near electronic devices like microwave ovens or cordless phones to reduce interference.
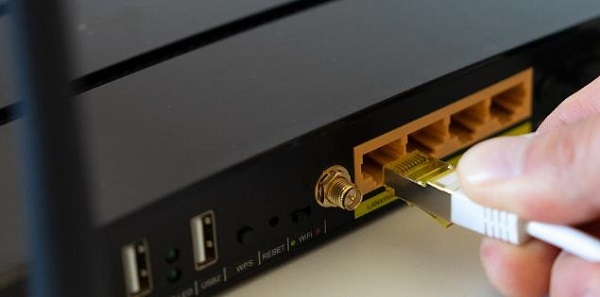
Use the 5GHz band on your router, which usually has less interference and faster speeds than the 2.4GHz band.
Ensure the router firmware is updated to the latest version for optimal performance.
6. Check for Hardware Issues
Check if the wireless network card is loose or damaged, and make sure it is properly inserted into your computer's slot.
If using a USB wireless network card, try plugging it into a different USB port or test other USB devices to ensure they work correctly.
In Device Manager, check the status of the wireless network card to see if there is a yellow exclamation mark or error code indicating a hardware issue.
If the wireless network card is confirmed to have a hardware fault, consider replacing it or contacting a professional for repair.
By following the steps in this article, you can troubleshoot and fix the issue to restore your wireless network connection. If the problem continues, consider contacting technical support for further help. We hope this guide helps enhance your wireless network experience.
See also:
How to Quickly Resolve Logitech Keyboard Lag Issues
How to Update Sound Card Drivers on Windows 10