Wireless network disconnection is a common issue for Windows users. This article offers effective solutions to quickly fix the problem and restore stable connectivity.
1. Update Drivers
Outdated or corrupted network adapter drivers are one of the most common causes of unstable Wi-Fi connections on computers. Updating the network adapter drivers is an important step to fix this issue. It is recommended to use Driver Sentry to automatically detect and update drivers, saving time and avoiding the risk of downloading or installing incorrect drivers.
Download the latest version of Driver Sentry. After installation, open the software and click "Scan".

Once the scan is complete, the results will show which drivers are missing or need updating. Locate the network adapter driver in the list and click the "Upgrade" button.
After updating, restart your computer to ensure the updated driver takes effect.
2. Restart Devices
Turn off your computer or other devices connected to the wireless network.
Restart your router by unplugging it from the power source, waiting 2-3 minutes, and plugging it back in.
Once the router has fully rebooted, turn your computer back on and try reconnecting to the Wi-Fi.
3. Reset Network Settings
Open Settings and click "Network & Internet".
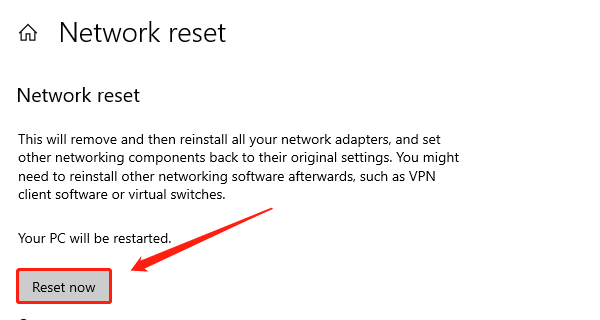
From the left menu, select "Status" and click "Network reset".
Click "Reset now" to reset all network adapters and restore them to their default settings.

Restart your computer, reconnect to the Wi-Fi, and check if the disconnection issue is resolved.
4. Adjust Power Management Settings
Press Windows + X and select "Device Manager".
Expand "Network Adapters" in the Device Manager, right-click your wireless adapter, and select "Properties".
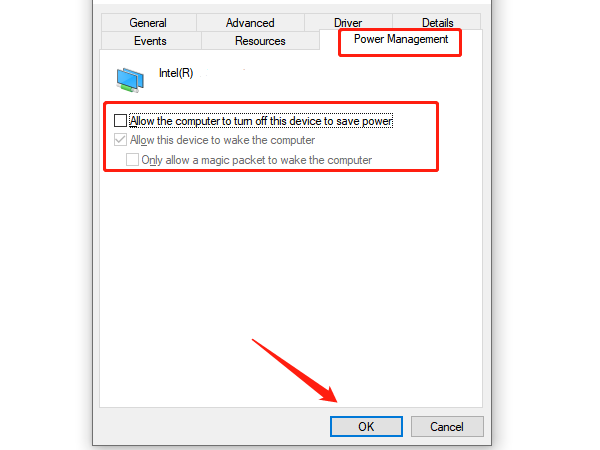
Go to the "Power Management" tab and uncheck "Allow the computer to turn off this device to save power".

Click "OK" to save the changes and exit.
Restart your computer, reconnect to the Wi-Fi, and check if the network remains stable.
5. Disable IPv6 Protocol
Right-click the Network icon in the taskbar and select "Open Network & Internet settings".
Click "Change adapter options".
Right-click the currently connected wireless network and select "Properties".
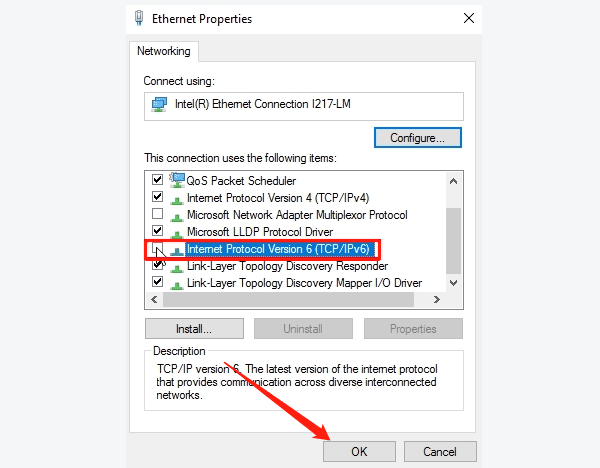
In the properties window, locate "Internet Protocol Version 6 (TCP/IPv6)" and uncheck the box next to it.

Click "OK" to save the changes and close the window.
Reconnect to the Wi-Fi and check if the network disconnection issue is resolved.
6. Run the Network Troubleshooter
Open Settings and click "Update & Security".
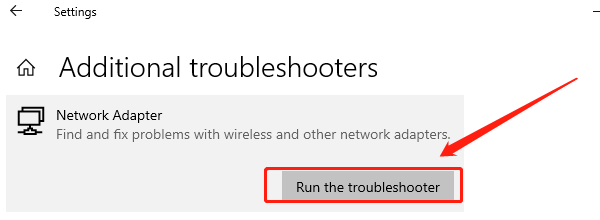
From the left menu, select "Troubleshoot" and then click "Additional troubleshooters".
Find "Network Adapter" and click "Run the troubleshooter".

The system will automatically scan for and fix issues with your wireless network connection.
After the troubleshooting is complete, restart your computer and check if the problem is resolved.
By following these methods, you can effectively diagnose and fix wireless network disconnection issues. If the problem persists, consider contacting professional technical support for further assistance.
See also:
Resolve Audio Delay Issues on Windows
Fix Audio Cutting Out on Windows 11