Some Windows 10 users may face the "Wireless Service Not Running" issue. This article offers solutions to quickly resolve it and restore connectivity.
1. Check for Driver Updates
Outdated or corrupted network adapter drivers can cause the "Wireless Service Not Running" issue in Windows 10. Updating the driver can help resolve this problem. Using Driver Sentry to automatically detect and update drivers is highly recommended, as it saves time and reduces the risk of installing incorrect drivers.
Download the latest version of Driver Sentry and install the software. Open it and click "Scan".

After scanning, the software will display a list of drivers that are missing or need updates. Locate the network adapter driver and click the "Upgrade" button.
Once the update is complete, restart your computer to ensure the new driver is properly applied.
2. Restart the Wireless Network Service
Press Windows + R, type "services.msc", and press Enter to open the Services Manager.
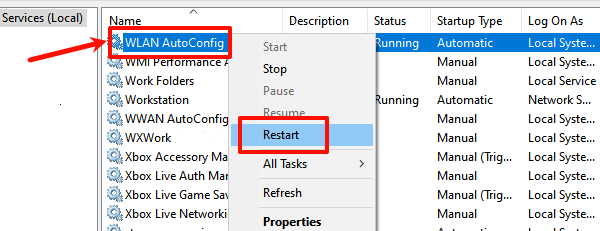
Locate the "WLAN AutoConfig" service in the list.
Right-click on "WLAN AutoConfig" and select "Restart".

If the service is not running, right-click and select "Start".
Check if the wireless network is now functioning properly.
3. Run the SFC Scan Tool
Press Windows + S, type "Command Prompt", and select "Run as Administrator".
In the Command Prompt window, type the following command and press Enter: sfc /scannow

The system will start scanning and automatically repair damaged system files. This process may take several minutes.
Once the scan is complete, restart your computer and check if the wireless service is restored.
4. Reset Network Settings
Press Windows + I to open "Settings".
Navigate to "Network & Internet" > "Status".
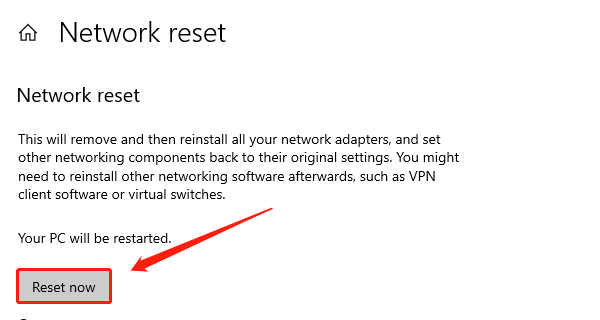
Scroll down and click on "Network Reset". Click the "Reset now" button.

Windows will uninstall and reinstall all network adapters and reset network settings to their defaults.
Restart your computer and check if the wireless network is functioning.
5. Run the Network Troubleshooter
Press Windows + I to open "Settings".
Go to "Update & Security" > "Troubleshoot".
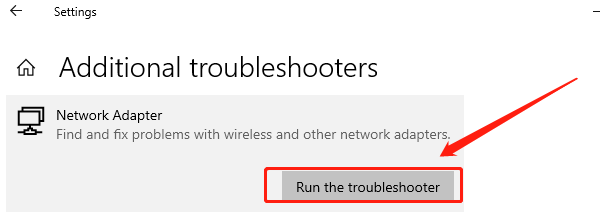
Under the Troubleshoot section, click on "Additional Troubleshooters".
Select "Network Adapter" and click "Run the Troubleshooter".

Follow the on-screen instructions to resolve detected issues.
After completing the troubleshooting process, restart your computer and check if the wireless service is operational.
6. Update Windows System
Press Windows + I to open "Settings".
Navigate to "Update & Security" > "Windows Update".
Click "Check for Updates".
If updates are available, install them and restart your computer.
After the update, verify if the wireless service is functioning properly.
Follow these steps to fix the "Wireless Service Not Running" issue on Windows 10. If the problem persists, contact technical support for help.
See also:
How to Fix League of Legends Not Opening
Fix the Overwatch 2 Not Launching Problem