After reinstalling the system, some users may face mouse issues. This article offers detailed solutions to help you quickly resolve the problem of the mouse not working.
1. Check Mouse Connection
Try plugging the mouse into different USB ports to rule out port issues.
If you are using a wireless mouse, ensure the wireless receiver is correctly inserted into the computer, and that the mouse battery is fully charged.
If your wireless mouse has a power switch, make sure it is turned on.
2. Update Mouse Driver
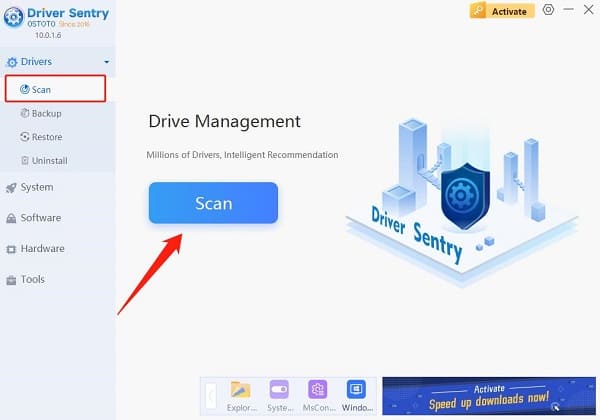
After reinstalling the system, the mouse driver may be missing or incompatible, which can cause the mouse to stop working. Updating the mouse driver can resolve this issue. It is recommended to use Driver Sentry to automatically detect and update drivers, saving time and avoiding downloading or installing the wrong driver.
Click the download button to get the latest version of Driver Sentry. After installation, open the software and click "Scan".

After scanning, the software will show which drivers are missing or need updates. Find the mouse driver in the list and click the "Update" button.
After the update is complete, restart your computer to ensure the updated driver is working correctly.
3. Enable USB Settings in BIOS
Restart your computer, and during startup, press Del, F2, F10, or Esc (depending on the brand) to enter the BIOS setup.
In the BIOS, use the arrow keys to navigate to the "Advanced" or "Peripherals" menu.
Locate "USB Configuration" or similar options. Ensure that "Legacy USB Support" or "USB Controller" is enabled.
Press F10 to save the settings and exit the BIOS. The system will restart, and you can check if the mouse is working.
Note: USB keyboards or mice might not work in the BIOS interface. It is recommended to use a PS/2 keyboard or mouse during BIOS configuration or use a laptop's touchpad if available.
4. Check USB Power Management Settings
Press Win + X and select "Device Manager".
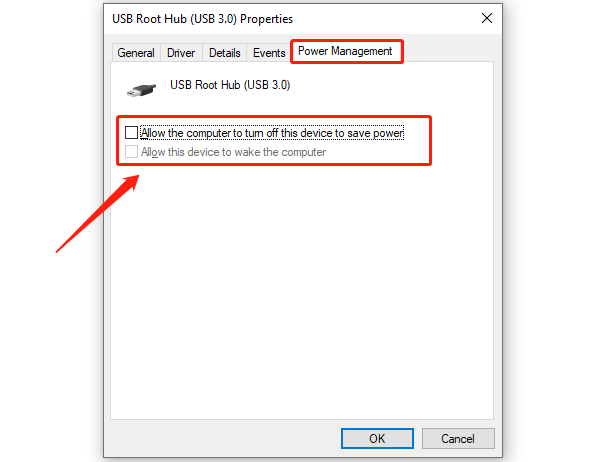
In Device Manager, expand "Universal Serial Bus controllers", find all listed "USB Root Hub" entries, right-click each, and select "Properties".
In the "Properties" window, click the "Power Management" tab and uncheck "Allow the computer to turn off this device to save power".

After adjusting all USB Root Hub settings, click "OK" to save.
Restart the computer and check if the mouse is now functioning.
5. Restore Default System Settings
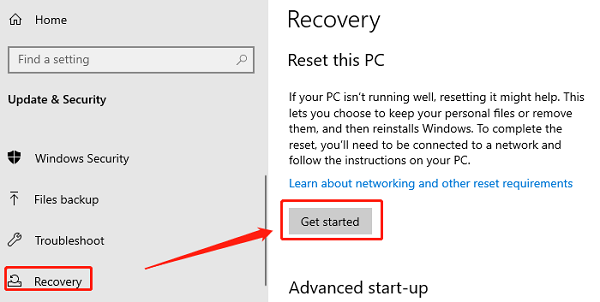
Press Win + I to open Windows Settings, and select "Update & Security".
Click "Recovery" in the left menu, find "Reset this PC", and then click the "Get started" button.

Choose "Keep my files", which will retain your personal files while resetting the system settings to default.
The system will automatically reset and restart. After the reboot, check if the mouse is working.
6. Check for Hardware Issues
Carefully inspect the USB ports for physical damage or dust buildup.
Check the motherboard's USB ports, especially on a desktop computer, to see if there are any issues.
If possible, use an external USB hub to eliminate potential motherboard USB port issues.
Test with a different mouse to determine if the issue is related to the mouse hardware itself.
By following these methods to inspect and adjust the mouse, you should be able to fix the issue of the mouse not working after a system reinstallation. If the problem persists, it is recommended to contact a professional technician for further diagnosis and repair.
See also:
8 Methods to Fix Missing Sound Icon in Windows 10
How to Fix HP Webcam Not Working Issues