Some Windows 11 users may experience system crashes, causing instability or program failures. This article offers solutions to fix crashes and restore smooth performance.
1. Update Drivers
Outdated or corrupted hardware drivers are one of the common causes of system crashes. First, ensure that all your drivers are updated to the latest versions. We recommend using Driver Sentry for automatic driver updates, saving time and avoiding the risk of downloading or installing incorrect drivers.
Click the download button to get the latest version of Driver Sentry. After installation, open the software and click "Scan".

After the scan is complete, it will show which drivers are missing or need updates. Find the drivers to update in the list and click the "Upgrade" button.
After the update is complete, it is recommended to restart the computer to ensure the updated drivers take effect.
2. Run SFC and DISM Scans
Use SFC (System File Checker) Scan:
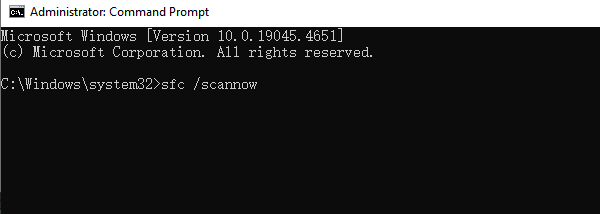
Press Win + S, type "Command Prompt", right-click, and select "Run as Administrator".
In the Command Prompt, enter the following command and press Enter: sfc /scannow

The system will start scanning and attempt to repair corrupted system files. This process can take several minutes to half an hour. If the repair is successful, restart the computer.
Use DISM Tool to Repair System Image:
Continue in the Command Prompt and run the following commands:
DISM /Online /Cleanup-Image /ScanHealth
DISM /Online /Cleanup-Image /RestoreHealth
This process may take some time. Once the repair is complete, restart your computer to apply the changes.
3. Check Hard Drive and Memory
Run Disk Check Tool:
Open Command Prompt (run as administrator).
Enter the following command and press Enter: chkdsk C: /f /r

If prompted to restart, type Y and press Enter.
The system will check the hard drive and attempt to fix any errors upon reboot.
Run Windows Memory Diagnostic Tool:
Press Win + S, search for "Windows Memory Diagnostic", and click to open.
Select "Restart now and check for problems".
The computer will automatically restart and check for memory issues. The results will be displayed after completion.
4. Check for System Updates
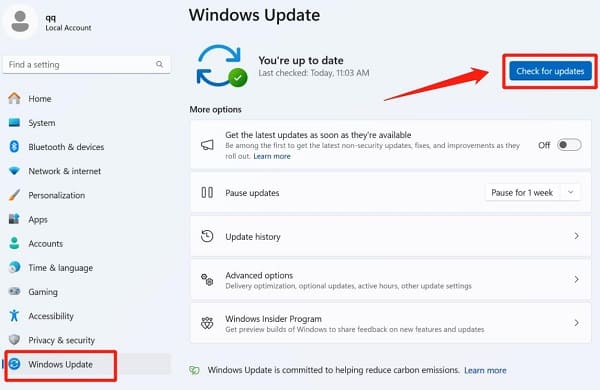
Press Win + I to open "Settings".
Go to "Update & Security" > "Windows Update".
Click "Check for Updates" to see if any new updates are available.

If updates are available, click Download and Install.
Once the updates are complete, restart the system to apply the changes.
5. Perform a Clean Boot
Press Win + R, type "msconfig", and press Enter.
In the "Services" tab, check "Hide all Microsoft services", then click "Disable All".
Switch to the "Startup" tab and click "Open Task Manager".
In Task Manager, disable all unnecessary startup items.
Click "OK", then restart the computer.
6. Monitor Component Temperatures
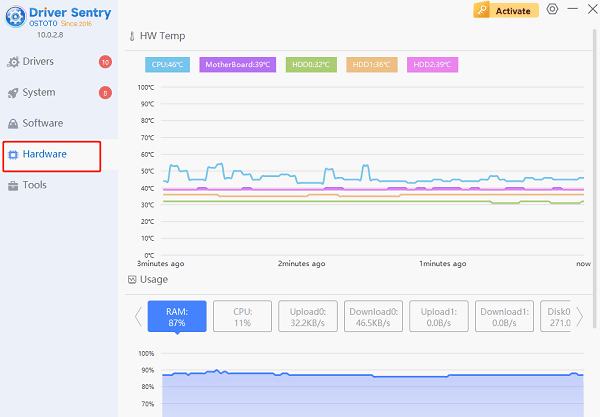
We recommend using Driver Sentry to monitor hardware temperatures by checking the "Hardware" section for CPU, GPU, and hard drive temperatures.
Under normal conditions, CPU temperature should range from 30°C to 70°C, and GPU temperature should be between 30°C and 80°C.

Take Cooling Measures:
Clean dust from the computer.
Ensure that heat sinks and fans are working properly.
If necessary, replace thermal paste or add additional cooling devices.
7. Remove Viruses and Malware
Use Windows Built-in Antivirus Tool:
Open "Settings", go to "Update & Security" > "Windows Security".
Click "Virus & Threat Protection", then choose "Quick Scan" or "Full Scan".
Use Third-Party Antivirus Software:
Open your third-party antivirus software and run a deep scan to find and remove potential viruses or malware.
Ensure that the real-time protection feature is enabled to prevent future malware infections.
Follow these steps to troubleshoot system issues and improve stability. If the problem continues, back up your data and contact technical support or reinstall the system.
See also:
Guide to Fixing a Non-Working Mouse