
Changing your screen resolution can significantly impact how content appears on your monitor. How to Change the Screen Resolution When You Need to? In this guide, we will walk you through the steps to change the screen resolution in Windows.
Understanding Screen Resolution
Screen resolution refers to the number of pixels displayed on your monitor. It is often described in terms of width by height, such as 1920x1080, where the first number is the width (in pixels) and the second number is the height.
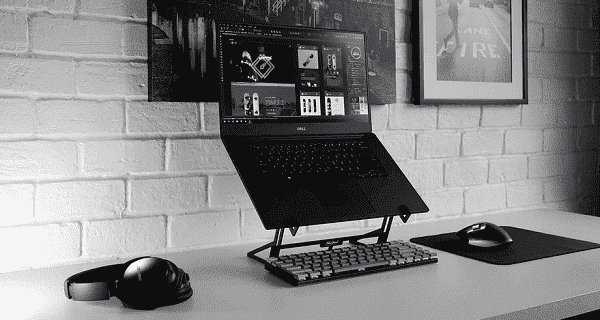
A higher resolution provides a clearer and sharper image, but it can also make icons and text appear smaller. On the other hand, a lower resolution might make text and icons appear larger but can result in a less detailed image.
Method 1: Change Screen Resolution Using Windows Settings
1) Open Display Settings
Right-click on the desktop and select Display settings from the context menu. This will open the Settings window dedicated to display configuration.
2) Adjust Resolution
Scroll down until you see the Display resolution option. You'll be presented with a dropdown menu showing various supported screen resolutions.
Select the resolution you want to use. For most users, 1920x1080 is the default choice, but if you have a 4K display, you might opt for 3840x2160.
Once selected, click Apply.

3) Confirm Changes
After applying the new resolution, your screen will blink momentarily, and you will be asked to confirm the new settings. If the screen looks good, click Keep changes; if not, select Revert to return to the previous resolution.
4) Scale and Layout Adjustments
If you find that the text or icons are too small after changing the resolution, you can adjust the Scale and layout options in the same settings menu. You can change the scaling to make text, apps, and other items larger or smaller according to your preference.
Method 2: Change Screen Resolution Using Graphics Control Panel
For more advanced display settings, you can also use the graphics control panel provided by your graphics card manufacturer (Intel, NVIDIA, or AMD). Here's how to access it:
1) Open the Graphics Control Panel
Right-click on the desktop and look for an option like NVIDIA Control Panel or AMD Radeon Settings. If you don't see the option, ensure that the graphics drivers for your system are properly installed.
2) Select Display Settings
Once the control panel opens, navigate to the Display or Resolution section.
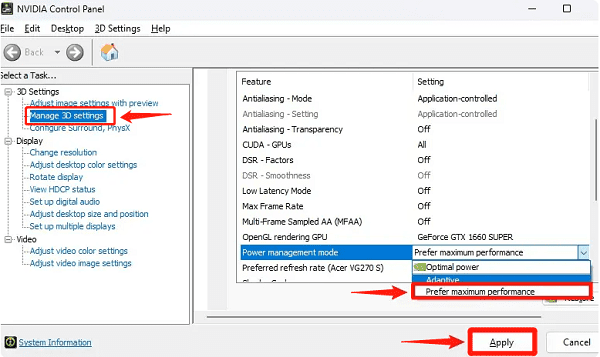
3) Adjust Resolution
Here, you can select your desired screen resolution. The control panel often provides more options than the Windows Settings app, especially if your graphics card supports multiple custom resolutions.
4) Apply Changes
After selecting the resolution, click Apply and confirm the changes.
Method 3: Using Driver Sentry to Resolve Resolution Issues
If you've followed the previous steps but are still unable to adjust the screen resolution, the issue might lie with outdated or corrupt graphics drivers. In such cases, using a tool like Driver Sentry can be incredibly helpful.
Driver Sentry is a driver management software that scans your system for outdated or missing drivers and helps you easily update them.
1) Download and Install Driver Sentry
Visit the official Driver Sentry website and download the software. Once downloaded, run the installation file and follow the on-screen instructions to install the software.
2) Scan for Outdated Drivers
Open Driver Sentry and click on the Scan button. The program will begin scanning your system for any outdated or missing drivers.
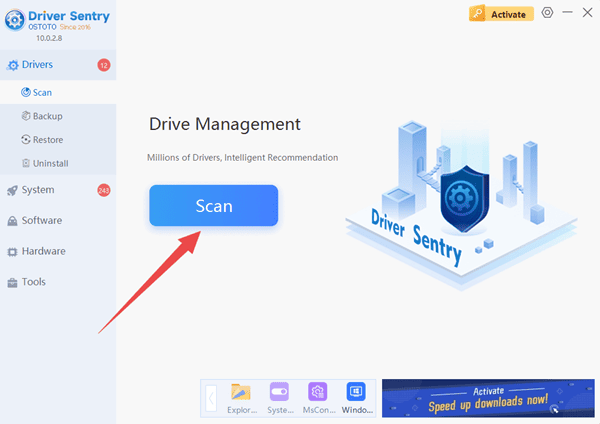
3) Upgrade Graphics Drivers
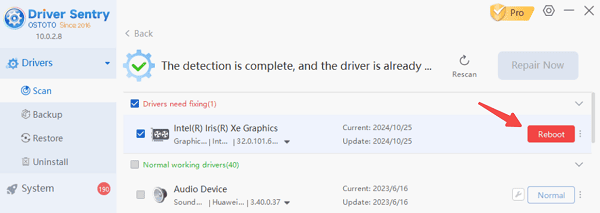
Once the scan is complete, Driver Sentry will display a list of outdated drivers. Look for your graphics driver (such as NVIDIA, AMD, or Intel) in the list.
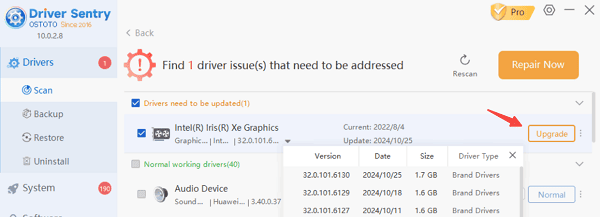
Select the driver and click on Upgrade. Driver Sentry will download and install the latest version of the driver, ensuring compatibility with your system and potentially solving any resolution issues.
4) Reboot Your Computer
After updating the driver, reboot your computer to apply the changes.
5) Check Resolution Again
Once your system has restarted, try adjusting the resolution again using either the Windows Settings or the graphics control panel. If the issue was related to outdated drivers, your desired resolution should now be available.
Method 4: Adjust Resolution in Safe Mode
In rare cases, if your computer is not displaying the resolution correctly, even after updating the drivers, you might need to start your computer in Safe Mode to troubleshoot further.
1) Enter Safe Mode
Restart your computer and press F8 (or Shift + F8) during boot to enter the advanced boot options menu. Select Safe Mode.

2) Adjust Resolution
Once in Safe Mode, right-click on the desktop and open Display settings. Try adjusting the resolution as you normally would. Safe Mode loads only essential drivers, which can help you bypass issues caused by conflicting software or drivers.
3) Exit Safe Mode
After adjusting the resolution, restart your computer to exit Safe Mode.
If you've followed the basic methods and still can't get the resolution right, using a driver management tool like Driver Sentry is a great way to ensure that your system's graphics drivers are up to date and fully compatible with your display hardware.
See also:
7 Ways to Fix the Unexpected Kernel Mode Trap Error
Fix Windows 10 PFN LIST CORRUPT BSOD Error