
The Device Manager is an essential Windows tool that allows you to view and manage hardware connected to your computer. This guide will walk you through multiple methods to open the Device Manager and explain its key functions.
1. What Is Device Manager?
The Device Manager is a built-in Windows utility that provides a graphical view of all the hardware devices installed on your system. It lets you:
View device status and troubleshoot errors.
Enable or disable devices.
Install, update, or roll back drivers.
Check for hardware conflicts.
2. How to Open Device Manager
There are several ways to open the Device Manager in Windows. Here are the most common methods:
1) Using the Start Menu
Click the Start button or press the Windows key on your keyboard.
Type Device Manager into the search bar.
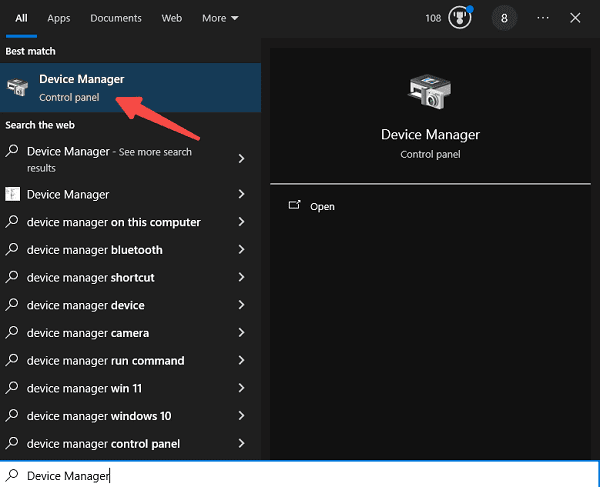
Click on the Device Manager app from the search results.
This is the quickest method for most users.
2) Through the Control Panel
Press Win + R to open the Run dialog box.
Type control and press Enter to open the Control Panel.
Navigate to Hardware and Sound > Device Manager.
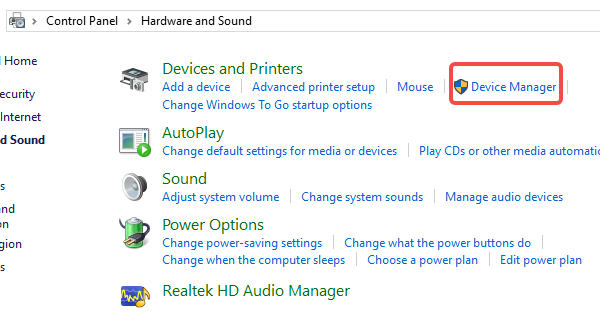
This method is useful for those who prefer using the Control Panel for system management.
3) Using the Run Command
Press Win + R to open the Run dialog box.
Type devmgmt.msc and press Enter.
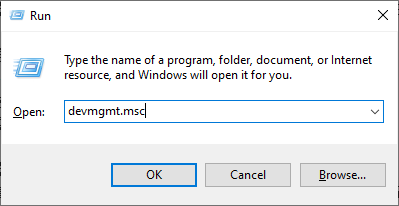
The Device Manager will open immediately. This method is direct and quick if you're comfortable using commands.
4) Via the Quick Access Menu
Press Win + X or right-click the Start button.
Select Device Manager from the menu.
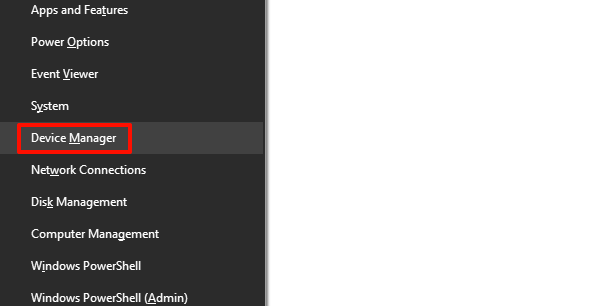
This is especially handy for advanced users who frequently access system tools.
3. Exploring the Features of Device Manager
Once you've opened the Device Manager, you’ll see a list of device categories such as Display Adapters, Network Adapters, Sound, Video, and Game Controllers, etc.
Expanding a Category: Click the arrow next to a category to view the devices under it.
Checking Device Status: Right-click a device and select Properties to check its status and troubleshoot.
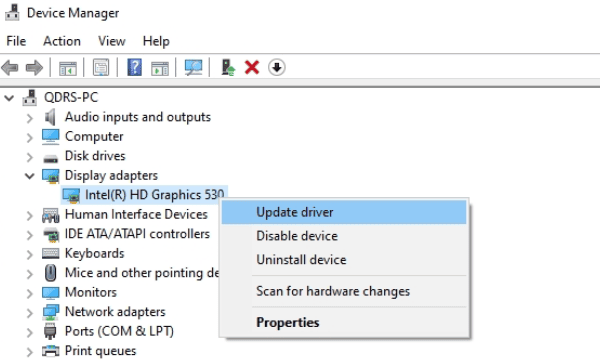
Updating a Driver: Right-click a device, select Update Driver, and choose to search automatically or manually for updated drivers.
While Windows can search for updated drivers, the results are not always the most current. This is where Driver Sentry comes in.
4. Simplify Driver Management with Driver Sentry
Keeping your drivers updated is crucial for optimal performance and system stability. While the Device Manager can handle basic updates, it doesn't always find the latest drivers. Driver Sentry offers a comprehensive solution:
Automatic Scans: Driver Sentry scans your system for outdated or missing drivers.
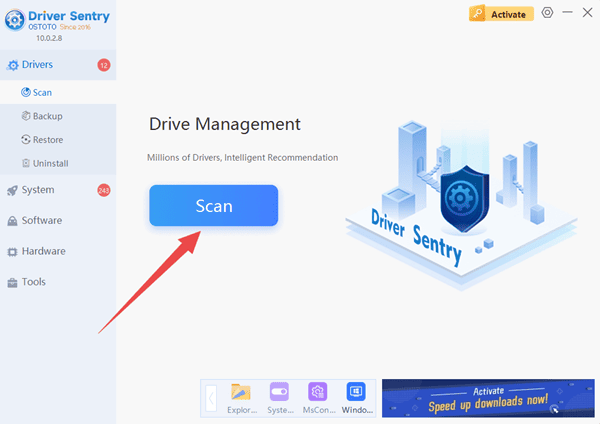
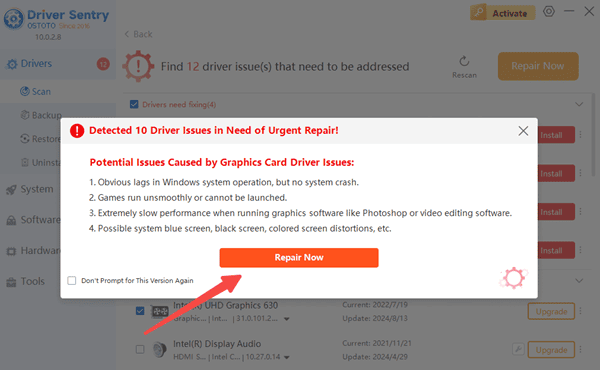
One-Click Updates: Update all your drivers with a single click.
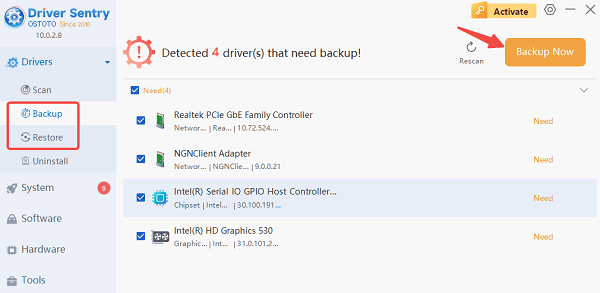
Backup and Restore: Create backups of your current drivers and restore them if needed.
Wide Compatibility: Supports a vast range of hardware devices and ensures you have the latest manufacturer-certified drivers.
Using Driver Sentry eliminates the guesswork and potential errors of manual driver updates.
5. When to Use Device Manager
Here are common scenarios where Device Manager is helpful:
Troubleshooting Device Issues: If a device isn't working correctly, Device Manager can help identify the problem.
Checking Device Status: Verify if a device is enabled and functioning.
Installing New Hardware: Manually install or update drivers for newly added devices.
Resolving Driver Conflicts: Check for resource conflicts and resolve them.
For routine driver updates, however, a tool like Driver Sentry is more efficient and user-friendly.
The Device Manager is an indispensable tool for managing your computer's hardware. Make the most of your hardware by mastering the Device Manager and complementing it with Driver Sentry. A little effort goes a long way in keeping your system running smoothly!
See also:
How to Fix Slow Printing Issues
Guide to Fixing Printer Not Printing in Color