Improving GPU performance is essential for many users, especially gamers and designers. This article offers effective methods to boost GPU performance for a smoother experience.
1. Update Graphics Drivers
Graphics drivers are key to ensuring the proper functioning of the GPU. Outdated drivers can affect GPU performance, causing issues like game stuttering or slow video rendering. Therefore, keeping your drivers up to date is the first step in enhancing GPU performance. It is recommended to use Driver Sentry to automatically detect and update drivers, saving time and avoiding the risk of downloading or installing incorrect drivers.
Click the download button to get the latest version of Driver Sentry. After installation, open the software and click "Scan".

After scanning, it will display which drivers are missing or need updating. Find the graphics driver in the list and click the "Upgrade" button.
Once the update is complete, it is recommended to restart your computer to ensure the updated drivers take effect.
2. Lower Resolution
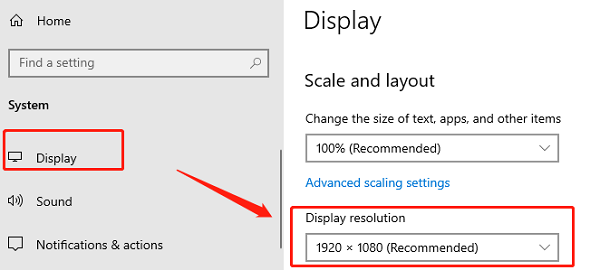
Right-click on the desktop and select "Display Settings".
In the Display Settings window, find the "Display Resolution" option.
From the drop-down menu, choose a lower resolution. Typically, "1920x1080" (Full HD) is the standard resolution for gaming. If your system struggles to run smoothly, try selecting a lower resolution, such as "1600x900" or "1280x720".

After selecting the new resolution, the system will prompt you to confirm if you want to keep the new setting.
If the new resolution results in smoother gameplay, select "Keep Changes". If you're not satisfied, you can choose "Revert" and select another resolution.
3. Modify Game Video Settings
Launch the game and go to the "Settings" or "Options" menu.
Look for "Video Settings" or "Graphics Settings". Here, you will typically find several options such as resolution, graphic quality, shadow effects, texture quality, etc.
Reduce the graphic quality and effects: Set the "Graphic Quality" or "Video Quality" to "Low" or "Medium" and turn off some resource-intensive effects (e.g., shadows, reflections, motion blur, etc.).
Adjust the frame rate limit: If the game's frame rate is too high (e.g., exceeding the monitor's refresh rate), you can set a frame rate cap. For example, if your monitor refresh rate is 60Hz, limit the frame rate to 60.
Disable V-Sync: V-Sync locks the frame rate to prevent screen tearing, but it may cause gameplay to be less smooth at times. Try disabling it to see if it helps improve performance.
After adjusting the settings, save the changes and exit the settings menu to check if the game performance improves.
4. Adjust Display Refresh Rate
Right-click on the desktop and select "Display Settings".
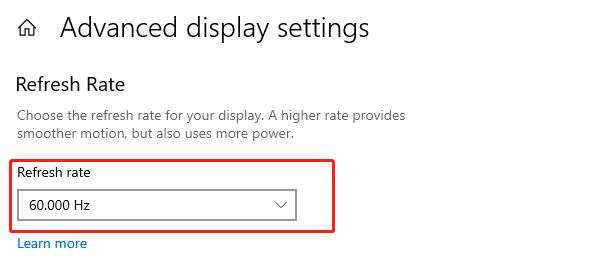
In Display Settings, scroll down and click on "Advanced Display Settings".
Find the "Refresh Rate" option and use the drop-down menu to select a higher refresh rate. Typically, 60Hz is the default refresh rate, but if your monitor supports higher refresh rates (e.g., 120Hz, 144Hz, or higher), you can choose a higher refresh rate to improve gaming performance.

If the new settings are effective, the monitor will prompt you to confirm. Click "Keep Changes" to confirm.
If your monitor does not support a higher refresh rate, the system will automatically revert to the default setting to ensure safety.
5. Increase System Memory
Check current memory:
Press Ctrl + Shift + Esc to open "Task Manager", then click the "Performance" tab to check the current memory usage.
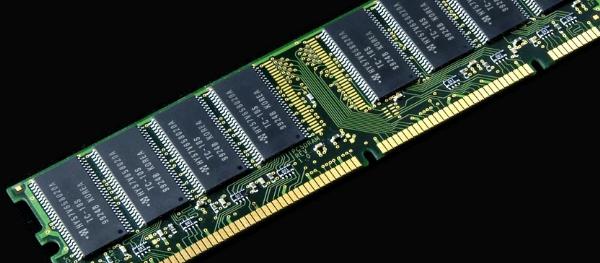
If memory usage is close to 100% and the computer configuration is low, consider adding more memory. Modern games typically require at least 8GB of RAM, and for larger games or running multiple programs simultaneously, 16GB or higher is more suitable.
Choose compatible memory:
Purchase memory modules that are compatible with your current RAM. You can check the supported memory types and maximum capacity via the motherboard model.
Turn off the computer, unplug the power cord, and open the case. Locate the memory slots on the motherboard, insert the memory module into the empty slot, and ensure it is firmly seated.

Power on the computer and check if the memory is correctly recognized. Press Win + R, type "msinfo32", and press Enter to view system memory information. If the new memory module is recognized, it has been successfully installed.
6. Regular Hardware Maintenance and Cleaning
Check if the power cables, data cables, and hard drive connections are secure to ensure proper hardware functioning.
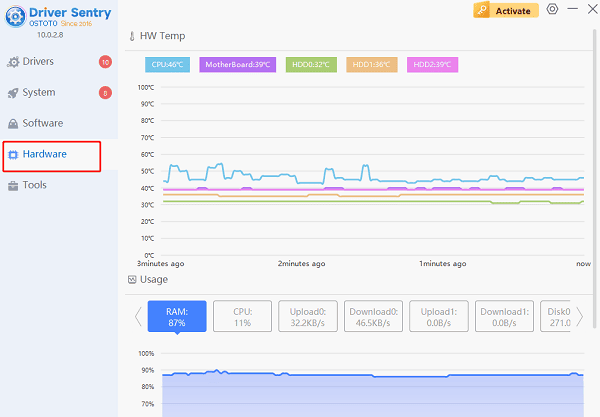
Use Driver Sentry's "Hardware" section to regularly check the temperatures of the CPU, GPU, and hard drive to avoid overheating and damage.

Before cleaning hardware, ensure the computer is turned off and unplugged to prevent electrical shock or damage.
Open the case and use compressed air or a soft brush to clean the internal hardware, especially the fans, graphics card, RAM, and heat sinks.
Dust accumulation can reduce the efficiency of fans and heat sinks, causing the system to overheat. Use compressed air to gently blow away dust to ensure the fans can rotate freely.
Following these steps will optimize your gaming experience, improve system performance, and prevent hardware issues. If problems persist, consider upgrading hardware or seeking professional support.
See also:
Guide to Fixing a Non-Working Mouse