How to Install a Virtual Sound Card on a Computer

A virtual sound card lets users share audio between applications and output to multiple virtual devices. This guide explains how to install a virtual sound card on a Windows system to easily resolve audio issues.
What is a Virtual Sound Card
A virtual sound card is a software-based device that simulates the functionality of a physical sound card. With a virtual sound card, you can aggregate audio from different applications or output sound to multiple virtual devices. Common use cases include audio recording, combining multiple sound sources during live streaming, or simultaneously outputting background music and game sound effects in gaming.
Preparation Before Installation
Sound card drivers are essential components of a computer, facilitating communication between the audio hardware and the operating system to ensure high-quality audio output. If drivers are not properly installed, you may experience poor sound quality, delays, or no sound at all. It's recommended to use Driver Sentry to automatically detect and update drivers, saving time and reducing the risk of installing incorrect drivers.
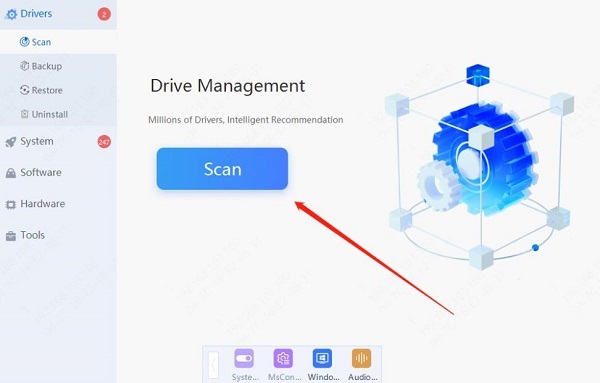
Click the download button to get the latest version of Driver Sentry, install and open the software, then click "Scan".

Once the scan is complete, you'll see which drivers are missing or need updating. Find the sound card driver in the results list and click "Update".
After the update, it is advisable to restart your computer to ensure the newly updated driver works correctly.
How to Install a Virtual Sound Card
Step 1: Download and Install the Virtual Sound Card Software
Choose the appropriate virtual sound card software based on your needs.
Once downloaded, extract the files and run the installer as an administrator. Follow the instructions to complete the installation.
After installation, it's recommended to restart your computer to ensure the virtual sound card operates correctly.
Step 2: Configure the Virtual Sound Card
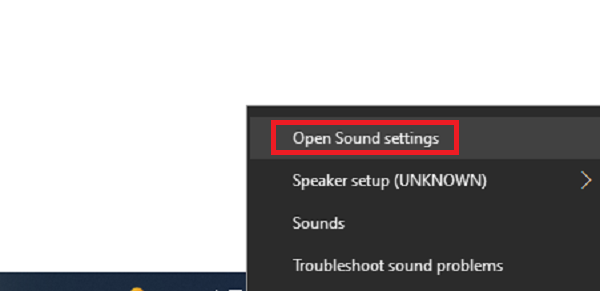
Right-click the volume icon in the taskbar and select "Open Sound settings".

Under "Output Device", select the virtual sound card you just installed.
If you want to route audio to multiple applications, you can also select the virtual sound card under "Input Device".
Step 3: Test the Virtual Sound Card
After installation and configuration, test the virtual sound card using audio software.
Play music or select the virtual sound card as the input device in recording software to check if the audio is outputting and receiving correctly.

If everything works properly, you should be able to process audio signals through the virtual sound card.
Frequently Asked Questions
1.What if the virtual sound card doesn't output audio?
Check if the correct input/output device is selected in your audio settings. Make sure the virtual sound card is set as the default audio device in "Sound Settings". Also, ensure the software version is compatible with your system.
2. What if there is latency with the virtual sound card?
Some virtual sound cards may introduce latency when processing audio. Try adjusting the audio buffer settings in the software or lower the sample rate to reduce latency.
3. How do I uninstall the virtual sound card?
If you no longer need the virtual sound card, go to "Control Panel" > "Programs and Features", find the installed virtual sound card software, and select "Uninstall".
By following these steps, you can easily install and configure a virtual sound card on a Windows system to improve audio processing efficiency. If you encounter any issues during installation or use, refer to the FAQ section or seek professional technical support.
See also:
Effective Methods to Resolve Windows Driver Issues
How to Quickly and Safely Update Your Graphics Drivers