How to Manage Network Adapter Drivers in Windows 10

Network adapter drivers connect your computer to the internet and other devices. To maintain stable connections and performance, regularly install, locate, and update these drivers. This guide explains how to do this in Windows 10.
1. How to Install Network Adapter Drivers
1.1. Automatic Installation
Connect the network adapter to your computer.
Ensure your computer is connected to the internet. Windows 10 will automatically download and install the latest driver for your network adapter.
After installation, restart your computer to ensure the driver is functioning correctly.
1.2. Manual Installation
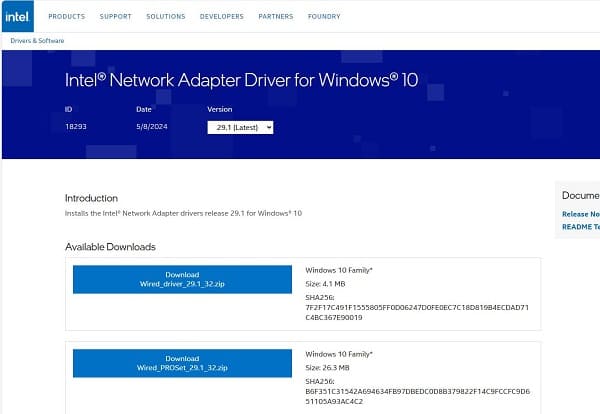
1). Visit the network adapter manufacturer's website (e.g., Intel, Realtek).
2). Find the latest driver for your network adapter model and ensure it's compatible with Windows 10.
3). Download the driver file and follow the on-screen instructions for installation. Typically, the installer will run automatically, but sometimes you may need to manually extract the files, right-click the .inf file, and select "Install".
4). After installation, restart your computer to apply the changes.
5). Verify the installation by checking Device Manager to ensure there are no warning symbols next to the network adapter.
6). Connect to your network and ensure your Internet connection is working correctly.
2. How to Locate Network Adapter Drivers
2.1. Using Device Manager
Right-click the Start menu and select "Device Manager".
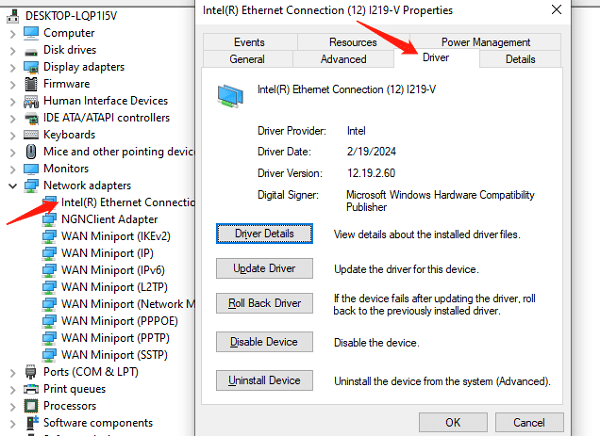
In the Device Manager window, expand the "Network adapters" section to view the list of installed network adapters.
Right-click the network adapter and select "Properties". Under the "Driver" tab, you can see the current driver version and date.
2.2. Using System Information Tool
Press Win + R to open the Run dialog, type "msinfo32", and press Enter.
In the System Information window, expand "Components" and select "Network" and then "Adapter".
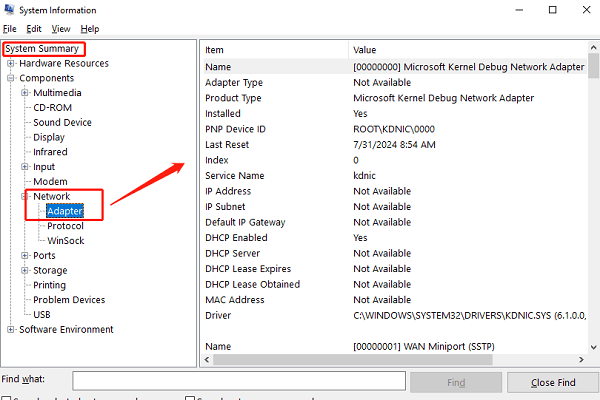
Here, you can find detailed information about your network adapter, including the model and manufacturer.
3. How to Update Network Adapter Drivers
3.1. Using Driver Sentry
Outdated, corrupted, or incompatible drivers can cause performance issues, hardware malfunctions, or system crashes. Driver Sentry is recommended for automatically detecting and updating drivers, saving time and avoiding the risk of downloading or installing incorrect drivers.
1). Download and install the latest version of Driver Sentry. Open the software and click "Scan".
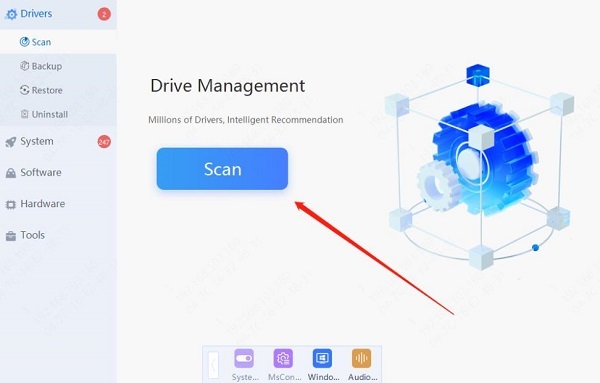
2). Once the scan is complete, it will show which drivers are missing or need updating. Locate the network adapter driver in the list and click "Update".
3). After updating, restart your computer to ensure the updated driver is applied correctly.
3.2. Using Device Manager
Open Device Manager and find the "Network adapters" section.
Right-click the network adapter you want to update and select "Update driver".
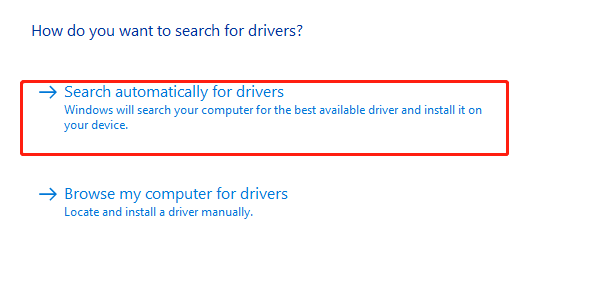
Choose "Search automatically for drivers" and follow the prompts to complete the update.
3.3. Manual Update
Visit the network adapter manufacturer's website and find the latest driver on the support or download page.
Download and extract the driver files compatible with your current operating system.
In Device Manager, right-click the network adapter, select "Update driver", then choose "Browse my computer for drivers", and locate the extracted driver files to perform the update.
Keeping your network adapter drivers updated is essential for stable network performance. Follow these steps to install, locate, and update drivers in Windows 10. For any issues, seek help from technical support or visit the manufacturer's website.
See also:
8 Common Solutions for No Internet Connection
How to Download and Install Wireless Network Card Drivers