The "No Audio Device Installed" error is a common issue in Windows 10. This article offers effective solutions to resolve it quickly.
1. Update Device Drivers
Outdated or corrupted drivers are a primary cause of the "No Audio Device Installed" error. Using a tool like Driver Sentry can help you detect and update drivers automatically, saving time and avoiding errors during installation.
Download the latest version of Driver Sentry, install it, and open the software. Click "Scan".

The scan will identify drivers that are missing or outdated. Locate the audio driver in the results and click "Upgrade".
Restart your computer after the update to ensure the new driver functions properly.
2. Check Hardware Connections
Ensure the audio cable or headphone jack is securely connected to the computer's audio port (usually a green port).

For USB or Bluetooth audio devices, verify the device is properly connected and functioning.
Test a different audio port to rule out port issues.
If using a Bluetooth device, confirm that it is successfully paired.
Connect your headphones or speakers to another device (e.g., a phone or another computer) to confirm they are working correctly.
3. Restart Windows Audio Services
Press Windows + R, type "services.msc", and press Enter.
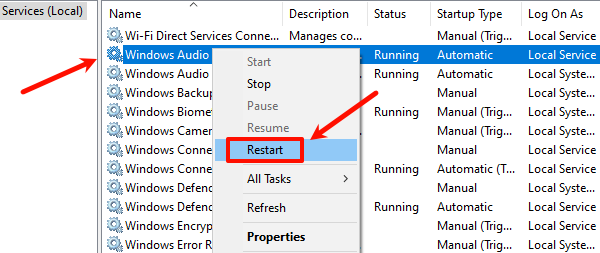
In the Services list, locate "Windows Audio" and "Windows Audio Endpoint Builder".
Right-click on each service and select "Restart".

If a service is not running, right-click and select "Start".
After restarting the services, check if the audio device is functioning correctly.
4. Check Audio Device Settings
Right-click the volume icon in the bottom-right corner of the taskbar and select "Open Sound Settings".
Under the "Output" dropdown menu, ensure the correct audio device is selected.
Click "Manage Sound Devices" and look for your audio device under the Disabled list. Click "Enable" if it is disabled.
Return to the Sound Settings page and click the "Test" button to verify if the sound is working.
5. Install a Generic Audio Driver
Press Windows + X and select "Device Manager".
Expand the "Sound, video, and game controllers" section. Right-click your audio device and select "Update Driver".
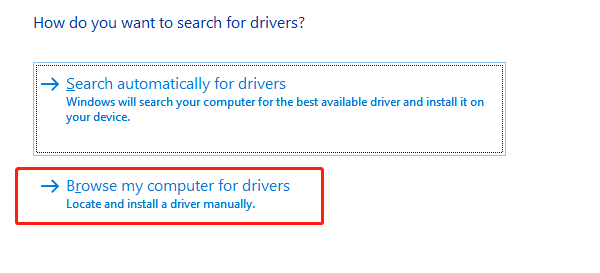
Choose "Browse my computer for drivers".

Click "Let me pick from a list of available drivers" on my computer.
Select "High Definition Audio Device" (not Realtek High Definition Audio or other drivers), and click "Next".
If a warning message appears, click "Yes" to proceed. The generic audio driver will be installed.
Restart your computer and check if the audio device works correctly.
6. Run the Troubleshooter
Press Windows + I to open Settings.
Navigate to "Update & Security" > "Troubleshoot".
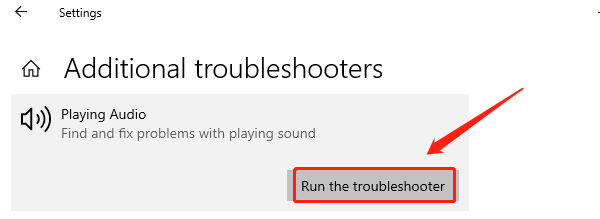
Click "Additional Troubleshooters" and find the "Playing Audio" option. Click "Run the Troubleshooter".

Windows will begin scanning for audio issues and automatically fix detected problems. Follow the on-screen instructions and check if the issue is resolved.
Follow these steps to fix the "No Audio Device Installed" error on Windows 10. If the issue continues, contact technical support for help.
See also:
How to Fix WiFi Not Connecting to the Internet
6 Methods to Fix Wireless Network Adapter Disabled