While using a Windows 11 computer, many people may find that their device doesn't recognize the NVIDIA graphics card when attempting to launch a game or design software. If your computer displays an error indicating it can't detect the graphics card, here are some solutions to try:
1. Check the Hardware Connection
Confirm the Slot: Ensure the graphics card is securely seated in the PCIe slot. A loose connection can prevent the system from detecting it.
If you're using a laptop, confirm that it's set to use the dedicated graphics card rather than the integrated one. Right-click on the desktop, select "Display Settings", scroll down, and locate "Graphics Settings". Here, make sure that applications requiring high performance are set to use the dedicated graphics card.

2. Check Device Manager
The Device Manager can help you check the status of your graphics card. Follow these steps:
Right-click on the "Start" button, select "Device Manager", expand the "Display adapters" option, and check if your NVIDIA graphics card is listed. If there's a yellow exclamation mark next to the card, it may indicate a driver issue, and you'll need to reinstall the driver.
3. Update the Driver
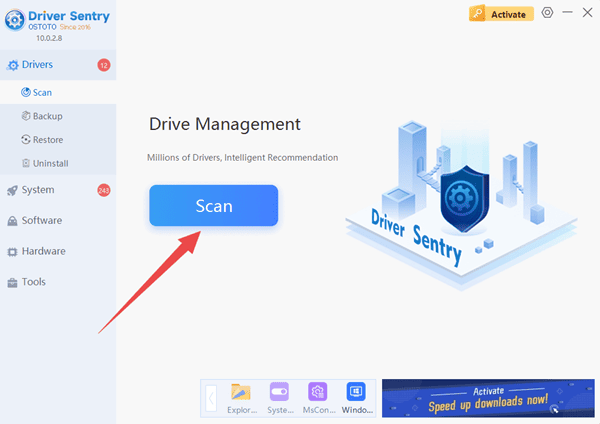
Drivers act as the bridge between the operating system and the graphics card. Outdated or corrupted drivers can cause the system to fail to recognize the graphics card. You can use the "Driver Sentry" tool to automatically detect and update your graphics card driver. This tool saves you the time of searching for and installing drivers manually, ensuring you have the latest version.
Download and open the Driver Sentry software, then click on the "Scan" option.

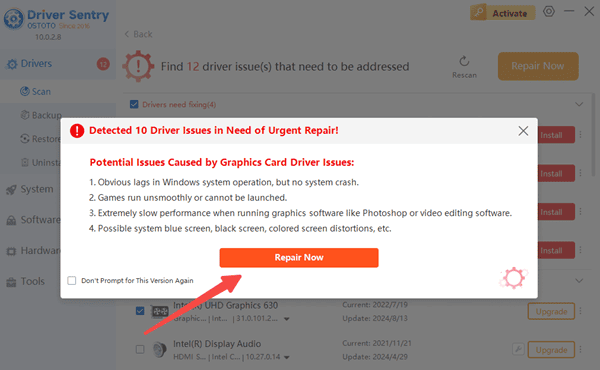
The software will automatically identify outdated or faulty hardware drivers. Click "Repair Now" for a quick, one-click update.

After updating, remember to restart your computer for the new driver to take effect.
4. Check BIOS Settings
Sometimes, the dedicated graphics card may be disabled or misconfigured in the BIOS, which can also cause detection issues.
When starting your computer, press the BIOS access key (such as F2 or Fn+F2, commonly for brands like Dell and HP) as soon as you see the brand logo.
Once in the BIOS settings, locate the "Integrated Graphics" or "Graphics Priority" option and ensure it is set to use the dedicated graphics card.
By following these steps, you should be able to troubleshoot and update your graphics card driver successfully. If you encounter any driver-related issues, "Driver Sentry" can assist you in quickly detecting and fixing them.
See also:
How to Fix NVIDIA Graphics Card Detection Issue
How to Open NVIDIA Control Panel and Settings Guide
5 Ways to Resolve the "Warning: Known issues with graphics driver"
NVIDIA releases driver version 560.94: boosts performance in games