Users may encounter a "Not Plugged In" error with Realtek High Definition Audio. This article offers simple methods to resolve the issue.
1. Update the Drivers
Outdated or corrupted drivers can cause the "Not Plugged In" error. Updating the audio drivers can effectively fix this problem. Using Driver Sentry to automatically detect and update drivers saves time and prevents errors during installation.
Download the latest version of Driver Sentry and install it. Open the software, click "Scan", and identify outdated or missing drivers.

Locate the audio driver in the results list and click "Upgrade".
Restart your computer after the update to ensure the changes take effect.
2. Check Hardware Connections
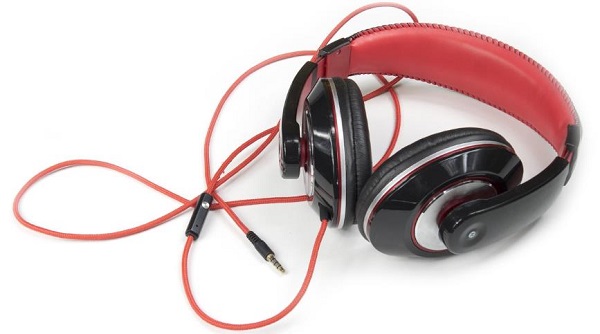
Ensure that the headphone or speaker plug is firmly connected to the computer's audio jack.
If using the front panel jack, try connecting to the rear audio jack to rule out front panel issues.
Test the headphones or speakers on another device (e.g., a smartphone) to confirm they are functioning correctly.
If the device works on other systems, the issue may lie with the computer's audio jack.

Clean the audio jack using a dry cotton swab or compressed air to remove dust or debris that might affect the connection.
3. Adjust Audio Settings
Set the Default Audio Device:
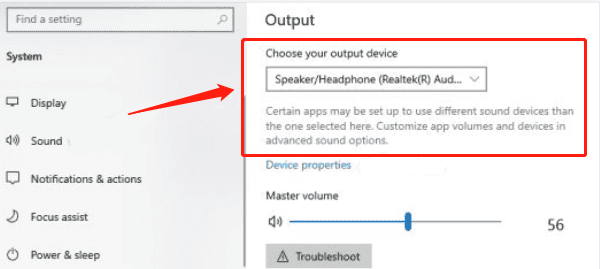
Right-click the volume icon in the taskbar and select "Open Sound Settings".
Under the "Output" section, ensure the correct audio device (e.g., Realtek High Definition Audio) is selected.
If the device is not listed, click "Manage Sound Devices" and enable the relevant device.

Test Audio Output:
In the "Sound" page, click "Device Properties", then select "Test".
If no sound plays, test other output devices.
Modify Driver Settings:
Open the "Control Panel" and navigate to "Realtek Audio Manager".
Ensure speakers or headphones are not disabled under "Advanced Device Settings".
4. Disable Front Panel Jack Detection
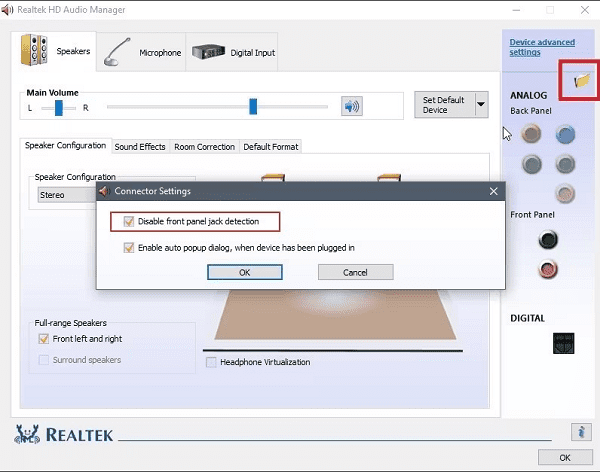
Locate the Realtek icon in the taskbar (if not visible, search for it in the Control Panel).
Double-click to open the Realtek High Definition Audio Manager.
Click the "Folder" icon (usually labeled as Advanced Settings).
Check the box for "Disable Front Panel Jack Detection", then click "OK".

Reconnect your headphones or speakers and check if the device works.
5. Run Audio Troubleshooter
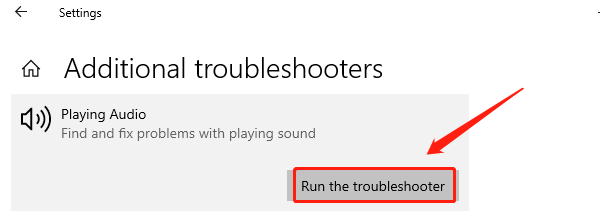
Press Win + I to open "Settings", then select "Update & Security" > "Troubleshoot".
Click "Additional Troubleshooters", find "Playing Audio", and click "Run the Troubleshooter".

Follow the prompts to diagnose and fix the issue.
Reconnect the audio device to test if the problem is resolved.
6. Reset Windows 10
Before resetting, back up important files to an external device or cloud storage.
Press Win + I to open Settings and navigate to "Update & Security" > "Recovery".
Under "Reset this PC", click "Get Started".
Choose "Keep My Files" to reset system settings only (recommended).
For severe issues, select "Remove Everything", which erases all data and apps.
Follow the prompts to complete the reset process.
Reinstall the Realtek driver and test the audio device.
Follow these steps to resolve the "Not Plugged In" error with Realtek High Definition Audio. If the issue persists, contact professional support or check the audio hardware for faults.
See also:
HP Printer Driver Unavailable Fix Guide
How to Fix Brother Printer Not Printing on Windows 10