In Windows 10, the network adapter is an essential component for ensuring a stable internet connection. If the adapter disappears, it may result in an inability to connect to Wi-Fi or Ethernet. This article provides multiple practical solutions to help you quickly restore your network connection.
1. Update the Network Driver
An outdated or corrupted driver is one of the most common causes of a missing network adapter. Updating the network adapter driver can effectively resolve this issue. Using Driver Sentry is recommended for automatic driver detection and updates, saving time and preventing incorrect driver installations.
Click the Download button to get the latest version of Driver Sentry. After installation, open the software and click "Scan".

Once the scan is complete, it will display missing or outdated drivers. Locate the network adapter driver in the results list and click "Upgrade".
After updating, restart your computer to ensure the new driver takes effect properly.
2. Scan for Hardware Changes
Press Win + X and select "Device Manager".
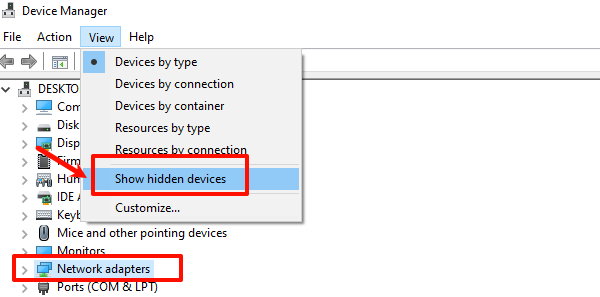
Click "View" > "Show hidden devices".

Under the "Network Adapters" section, check if any hidden devices appear.
If the network adapter is not listed, click "Action" > "Scan for hardware changes".
Check if the network adapter reappears.
3. Check Power Management Settings
Open Device Manager and locate "Network Adapters".
Right-click your network device and select "Properties".
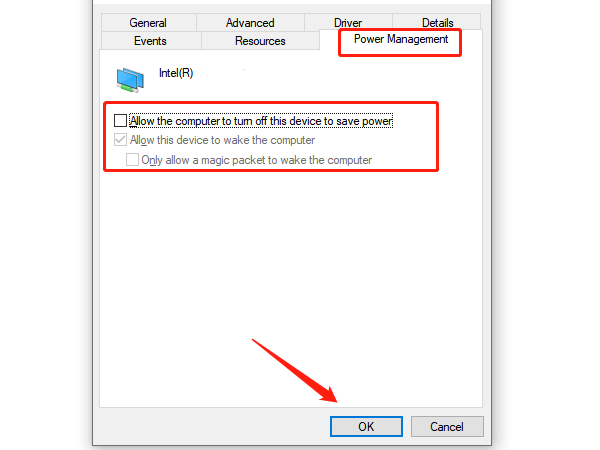
Switch to the "Power Management" tab and uncheck "Allow the computer to turn off this device to save power". Click "OK".

Restart your computer and check if the adapter is restored.
4. Check Background Services
Press Windows + R simultaneously to open the Run dialog box, type "services.msc", and press Enter.
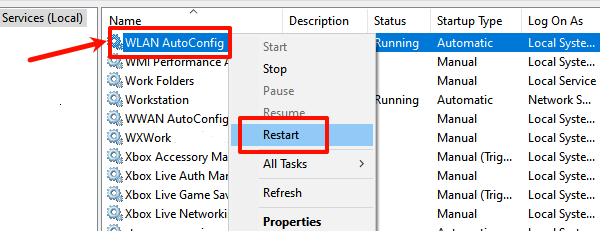
In the Services window, check if WLAN AutoConfig is running. If it is not running, click "Start" to enable the service. If it is already running, click "Restart".

Double-click the service to open its properties, find "Startup type", and set it to "Automatic".
Click "Apply" > "OK" to save the changes.
Restart your device and check if the missing driver has been restored.
5. Run Windows Network Troubleshooter
Press Win + I to open Settings.
Go to "Update & Security" > "Troubleshoot".
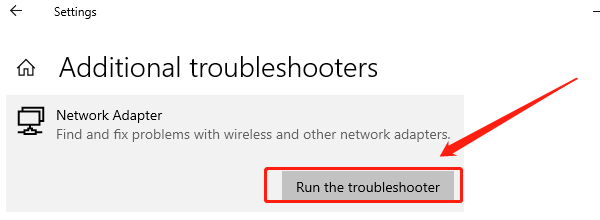
Under "Other troubleshooters", find "Network Adapter" and click "Run the troubleshooter".

Follow the on-screen instructions and check if the adapter is restored after troubleshooting.
6. Reset Network Settings
Open Settings (Win + I) and go to "Network & Internet" > "Status".
Scroll down and find "Network reset", then click "Reset now".
Windows will prompt, "This action will remove all network adapters". Click "Yes" to confirm.
Your computer will automatically restart. After the reset, reconnect to Wi-Fi or plug in an Ethernet cable to test the connection.
By following these steps, you should be able to resolve the issue of the missing network adapter. If the problem persists, consider seeking assistance from a professional.
See also:
Ways to Fix NVIDIA Driver Installation Failure
Troubleshooting DirectX 12 Unsupported on Windows Systems