In Windows, the WDF_Violation error is a common BSOD that can disrupt your system. This article offers solutions to fix the issue and restore normal operation.
1. Update Drivers
The WDF_Violation error is often related to outdated or corrupted drivers. Updating your device drivers can help resolve this issue. We recommend using Driver Sentry to automatically detect and update drivers, saving you time and avoiding the risk of downloading or installing incorrect drivers.
Click the download button to get the latest version of Driver Sentry, install it, and open the software. Then click "Scan".

After scanning, it will display the drivers that need to be installed or updated. Find the driver that needs updating and click the "Upgrade" button.
Once the update is complete, it is recommended to restart your computer to ensure the updated drivers are properly applied.
2. Check Hard Disk and Memory
Check the Hard Disk:
Press Windows + S, type "Command Prompt", and select "Run as administrator".
Enter the following command and press Enter: chkdsk C: /f /r

Here, C: is the partition you want to check. If you have multiple partitions, run this command for each partition.
The system will prompt you to scan the disk on the next reboot. Type "Y" and press Enter, then restart your computer.
The system will automatically check and fix any hard disk errors during startup. This process may take some time, depending on the size of the disk and the number of errors.
After the disk check is complete, check if the WDF_Violation error is resolved.
Check the Memory:
Press Windows + R, type "mdsched.exe", and press Enter to launch the Windows Memory Diagnostic tool.
In the pop-up window, choose "Restart now and check for problems".
The system will restart and automatically begin the memory check. Once completed, the system will display the diagnostic results.
If the tool detects memory issues, you may need to replace the faulty memory module.
3. Repair System Files
Press Windows + S, type "Command Prompt", and select "Run as administrator".
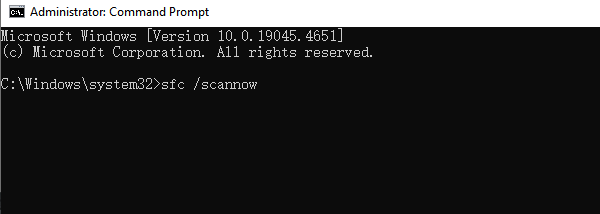
In the Command Prompt window, enter the following command and press Enter: sfc /scannow

The system will begin scanning and repairing corrupted system files. Once the scan is complete, it will provide a report.
If the system files are repaired successfully, restart your computer and check if the WDF_Violation error is resolved.
4. Remove HP Keyboard Driver
Restart your PC three times to enter the Windows Recovery Environment (Windows RE).
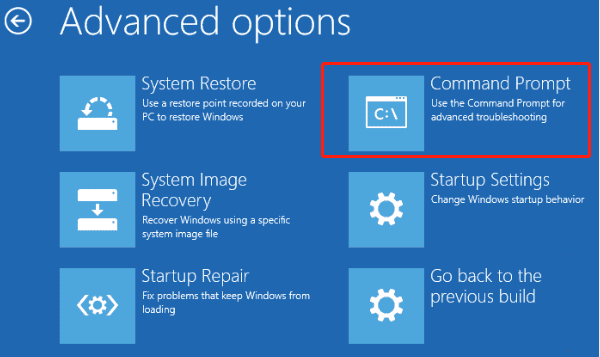
Select "Troubleshoot" > "Advanced options" > "Command Prompt".

Based on your Windows version, enter the following command and press Enter:
For 32-bit Windows: dism /image:C\ /Remove-Driver /Driver:C:\Windows\System32\DriverStore\FileRepository\hpqkbfiltr.inf_x86_f1527018cecbb8c2\HpqKbFiltr.inf
For 64-bit Windows: dism /image:C:\ /Remove-Driver /Driver:c:\Windows\System32\DriverStore\FileRepository\hpqkbfiltr.inf_amd64_714aca0508a80e9a\HpqKbFiltr.inf
After completion, exit and restart your computer.
5. Reconfigure HpqKbFiltr.sys
Restart your PC three times to enter the Windows Recovery Environment (Windows RE).
Then go to "Troubleshoot" > "Advanced options" > "Command Prompt".
Based on your Windows version, enter the following command and press Enter:
c:
cd Windows
cd System32
cd drivers
ren HpqKbFiltr.sys HpqKbFiltr.sys.bak
exit
Exit the Command Prompt and restart your computer.
6. Perform a System Restore
Press Windows + R to open the Run dialog, type "rstrui", and press Enter.
In the System Restore wizard, select a restore point before the issue occurred and click "Next".
Confirm your selected restore point and click "Finish".
The system will prompt you to restore your computer. During the restore process, the computer will restart and return to the chosen restore point.
After the restore is complete, check if the WDF_Violation error is resolved.
By following these steps, you can easily resolve the WDF_Violation blue screen error. If the issue persists, consider contacting professional technical support for further assistance.
See also:
Guide to Fix a Computer That Shuts Down Randomly
Resolve Error Code 0x80072f8f on Windows 10