Duplex printing is an eco-friendly and paper-saving option available on many modern printers. This article outlines the steps to set up duplex printing easily.
Step 1: Ensure Your Printer Supports Duplex Printing
Before starting, confirm that your printer has duplex printing capability. Check the printer's manual or visit the manufacturer's website to verify this feature.
Step 2: Install Printer Drivers
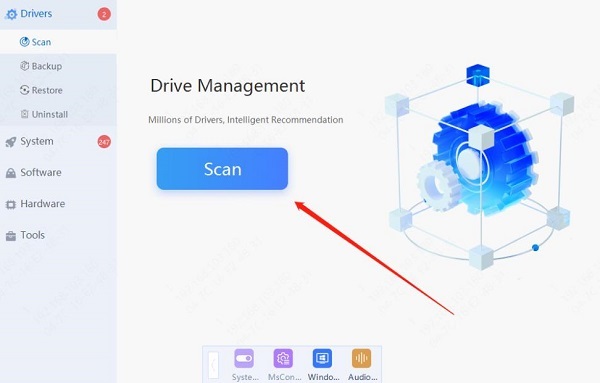
Make sure you have the latest printer drivers installed on your computer. It's recommended to use Driver Sentry to automatically detect and update drivers, saving you time and avoiding the risk of downloading or installing incorrect drivers.
Click the download button to get the latest version of Driver Sentry, then open the software after installation and click "Scan".

After scanning, it will display any missing or outdated drivers; find the printer driver in the list and click the "Update" button.
Once the update is complete, it's advisable to restart your computer to ensure the new drivers take effect.
Step 3: Open the Document to Print
Locate and open the document you need to print on your computer. Whether it's a Word document, Excel spreadsheet, or PDF file, double-click the file icon to open it. Ensure the content is edited and formatted according to your printing needs.
Step 4: Access Print Settings
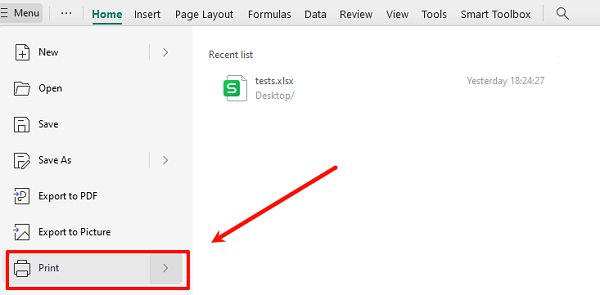
In the file menu, click "File".
Select "Print" from the dropdown menu, or simply press the shortcut key Ctrl + P to open the print settings window.

Step 5: Select Your Printer
In the "Printer" dropdown menu, find and click on your printer.
If your printer does not appear in the list, ensure it is connected to the computer and powered on. You may try reconnecting the printer.
Step 6: Set Up Duplex Printing
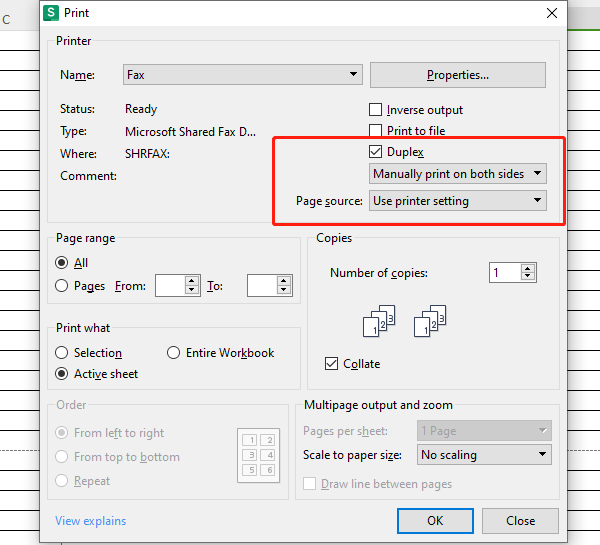
In the print settings window, look for the option for "Duplex" or "Print on Both Sides". This option may be under "Print Settings" or "Layout".
Choose "Automatic Duplex Printing" if your printer supports this function; the printer will handle duplex printing automatically.
If you select "Manual print on both sides", the system will prompt you to manually flip the pages after printing one side.

Step 7: Other Print Settings
Paper Size: Ensure the selected paper size matches the document, such as A4 or Letter.
Page Range: Choose the specific pages you want to print; you can select all pages or specific ones.
Print Quality: Select "Draft", "Normal", or "Best" quality settings based on your needs to balance speed and quality.
Step 8: Start Printing
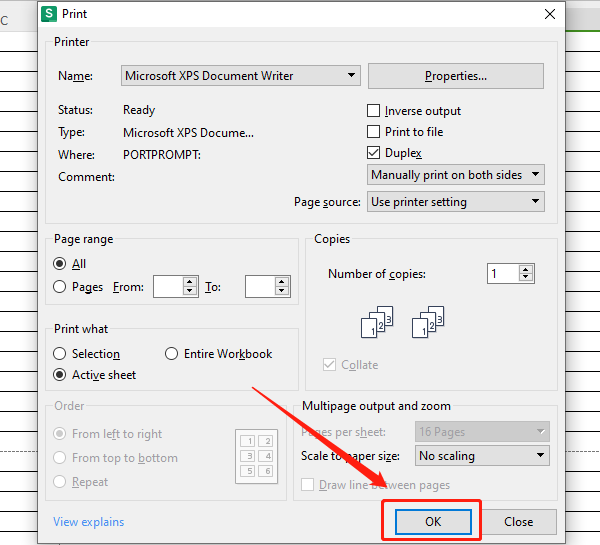
Once all settings are confirmed, you can start printing.
Click the "Print" or "OK" button in the print settings window. The printer will begin processing the print job, and you can monitor the progress on your computer.

Step 9: Check Print Results
Content Integrity: Ensure all content has printed without omissions.
Duplex Effect: Check if duplex printing went smoothly and confirm that content is on the correct pages.
Clarity: Ensure that the printed text and images are clear and readable without blurriness or ghosting.
By following these steps, you can easily set up duplex printing on your printer. If you encounter any issues, consult the user manual or contact technical support. Hopefully, this guide helps improve your printing experience!
See also:
7 Ways to Maximize GPU Performance
How to Fix Wireless Mouse Connection Failure