In daily office or home use, a printer failing to print is a common issue that can affect work efficiency. This article provides effective solutions to help you quickly restore printing functionality.
1. Check Printer Connection
Ensure that the USB cable is securely connected. Try switching to a different USB port or using a different cable.
Unplug and reconnect the USB cable, then check if the computer recognizes the printer.
For wireless printers, check the following:
Ensure that both the computer and the printer are connected to the same Wi-Fi network.
Restart the router and try reconnecting the printer to Wi-Fi.
Open "Devices and Printers" on your computer, right-click on the printer, select "Printer Properties", and verify if the port settings are correct.
2. Update Printer Drivers
Outdated or corrupted drivers are a common cause of printer issues. Updating the printer driver can effectively resolve this problem. It is recommended to use Driver Sentry to automatically detect and update drivers, saving time and avoiding the risk of installing incorrect drivers.
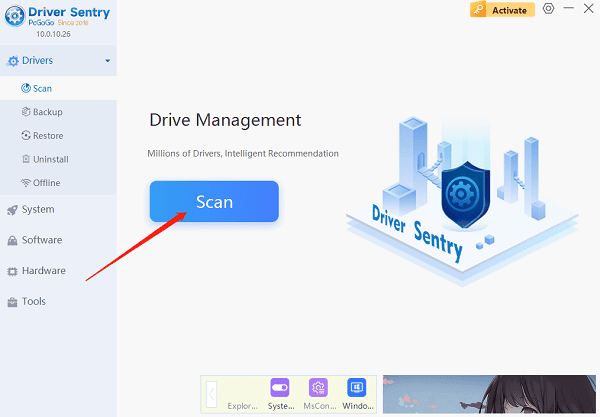
Click the Download button to get the latest version of Driver Sentry. Install and open the software, then click "Scan".

After scanning, a list of missing or outdated drivers will appear. Find the printer driver in the list and click "Upgrade".
After updating, restart your computer to ensure the new driver takes effect.
3. Set Printer as the Default Device
Type "Control Panel" in the Windows search bar and open it.
Select "Devices and Printers".
Locate your printer, right-click on it, and select "Set as Default Printer".
4. Clear Print Queue and Remove Stuck Jobs
Open "Control Panel" > "Devices and Printers".
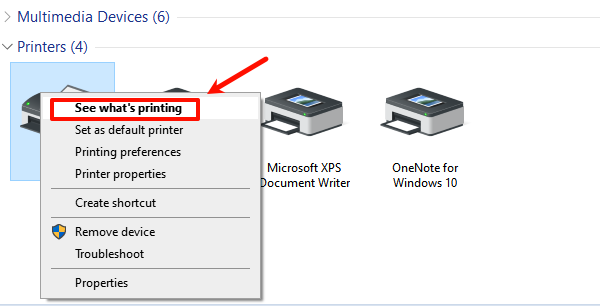
Find your printer icon, right-click on it, and select "See what's printing".

Select all pending print jobs, right-click, and choose "Cancel" or "Delete".
After clearing the print queue, restart the printer.
Ensure that the printer is not set to "Pause Printing" or "Use Printer Offline" mode. If it is, switch it back to "Online" status.
5. Run Windows Troubleshooter
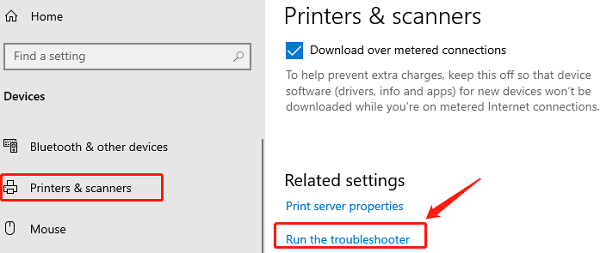
Go to "Settings" > "Devices" > "Printers & Scanners".
Scroll down and click "Run the Troubleshooter" to allow Windows to detect and fix the issue.

Follow the on-screen instructions to complete the troubleshooting process.
6. Check Paper and Ink/Toner
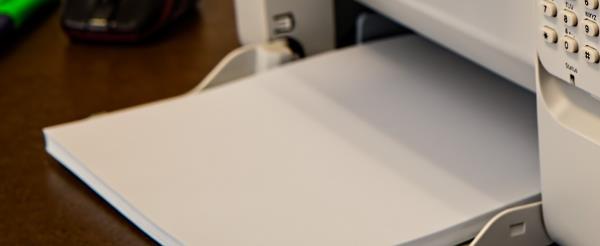
Open the printer tray and ensure that the paper is correctly placed and within the load limit. Remove any jammed paper if necessary.

Ensure that the ink or toner cartridge is installed correctly and not empty. If low ink or toner is detected, replace it with a compatible cartridge.
Use the printer's built-in cleaning function to clean the printhead and prevent print quality issues.
By following these steps, most printer-related issues can be resolved. If the problem persists after trying all the methods, consider contacting the printer manufacturer's customer support or seeking professional technical assistance for further diagnosis.
See also:
Solutions to Fix the Windows 11 Unidentified Network Issue
Solutions to Fix WiFi Connected but No Internet Issue