WiFi issues are common for many Windows users and can disrupt various activities. This article provides solutions to help you quickly restore network connectivity.
1. Check Driver Updates
Outdated or corrupted drivers can prevent your computer from connecting to WiFi. Checking for updates to your network driver can effectively resolve this issue. We recommend using Driver Sentry to automatically detect driver updates, saving you time and avoiding the risk of downloading or installing incorrect drivers.
Click the download button to get the latest version of Driver Sentry, then open the software after installation and click "Scan".

After scanning, it will show which drivers are missing or need updating. Find the network driver in the list and click the "Upgrade" button.
After updating, restart your computer to ensure the updated driver is applied correctly.
2. Check WiFi Connection Status
Click the WiFi icon in the lower-right corner of the taskbar to view the current network you're connected to, and make sure your network connection is correct.
If your WiFi network is not showing, try clicking "Refresh" to search for available networks again.
3. Restart Router and Modem
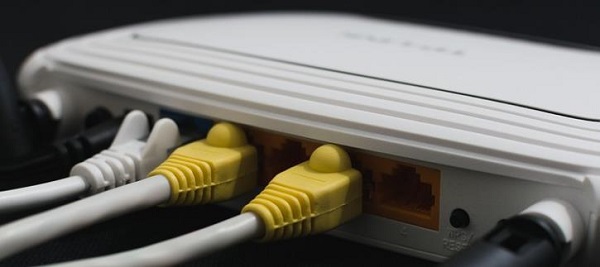
Unplug the power cords of your router and modem and wait for two to three minutes.
Plug them back in and wait for the devices to restart.

Wait until the router and modem indicator lights return to normal (usually green or blue).
Try reconnecting to the WiFi network to check if the issue is resolved.
4. Check DNS Settings
Open the "Control Panel" and select "Network and Sharing Center".
Click on "Change adapter settings", right-click on your connected WiFi network, and select "Properties".
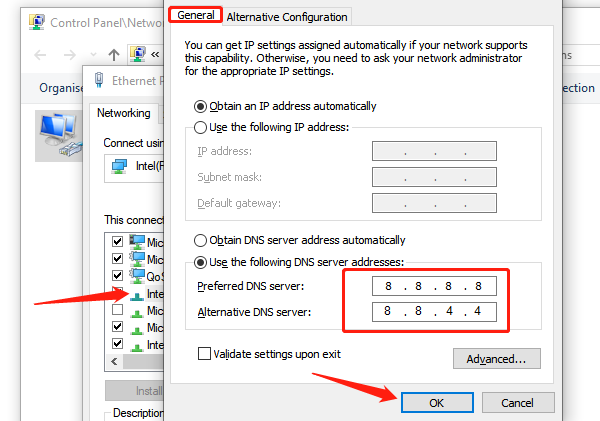
In the Properties window, double-click "Internet Protocol Version 4 (TCP/IPv4)".
Select "Use the following DNS server addresses" and enter the following public DNS server addresses:
Preferred DNS server: 8.8.8.8
Alternate DNS server: 8.8.4.4

Click "OK" to save the settings and reconnect to the WiFi network to see if you can access the internet.
5. Reset Network Settings
Click Start and select "Settings".
In the Settings window, select "Network & Internet".
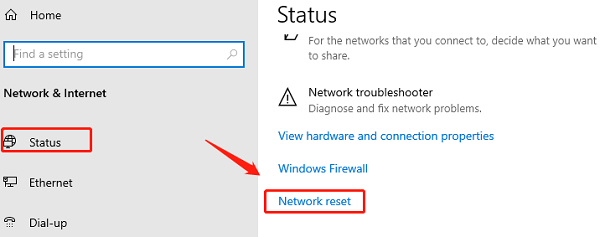
Click the "Status" tab, scroll down, and select "Network Reset".

Click the "Reset Now" button and confirm the action. Your computer will automatically restart and restore the default network settings.
After rebooting, check if the WiFi connection is restored.
6. Run Network Troubleshooter
Press the Windows key + I to open Settings, then select "Update & Security".
Click "Troubleshoot" and select "Additional troubleshooters".
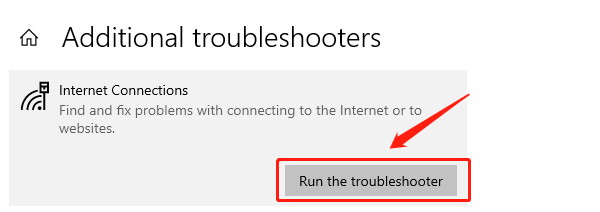
Find "Internet Connections" and click "Run the troubleshooter".

Follow the on-screen instructions, and the system will automatically scan and fix WiFi connection issues.
7. Check for Windows Updates
Click Start and select "Settings".
In the Settings window, select "Update & Security".
In the "Windows Update" section, click "Check for updates".
If updates are available, click "Install updates" and follow the on-screen instructions.
After installation, restart your computer and check if the WiFi connection is working again.
Following these steps should resolve most WiFi issues. If the problem persists, contact technical support for further assistance.
See also:
How to Fix Warframe Crashes on PC
Methods to Fix Oculus Hardware Error
How to Fix Windows 10 HDMI Port Not Working