Some Windows 10 users may face a missing wireless adapter issue, hindering wireless connections. This guide offers effective solutions to resolve it quickly.
1. Update Drivers
Outdated or corrupted drivers can cause the wireless adapter to disappear. Updating the network adapter driver can effectively fix the issue. Using Driver Sentry is recommended for automatic driver detection and updates, saving time and avoiding installation errors.
Download the latest version of Driver Sentry, install and open the software, then click "Scan".

After scanning, identify missing or outdated drivers in the results list. Locate the network adapter driver and click "Upgrade".
Restart your computer after updating to ensure the new driver is properly applied.
2. Check Hardware Connections
Ensure the wireless adapter is properly connected. For USB wireless adapters, verify it is securely inserted into the port.
For laptops, ensure the wireless switch (e.g., Fn + function key) is enabled.
Try plugging the adapter into a different USB port to rule out port issues.
3. Show Hidden Devices
Press Win + X and select "Device Manager".
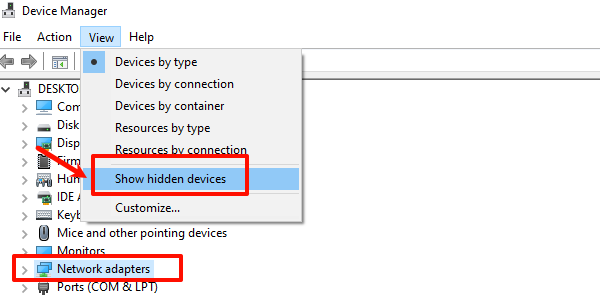
In the menu bar, click "View" and select "Show hidden devices".

Check if the wireless adapter appears under the network adapter list. If it is grayed out, right-click and select "Enable device".
If no device is listed, try clicking "Action" > "Scan for hardware changes".
4. Reset Winsock Settings
Press Win + S, search for "cmd", and right-click to select "Run as administrator".
Enter the following commands one by one, pressing Enter after each:
netsh winsock reset
netsh int ip reset
ipconfig /release
ipconfig /renew
ipconfig /flushdns
Restart your computer and check if the issue is resolved.
5. Run Network Troubleshooter
Press Win + I to open "Settings".
Navigate to "Update & Security" > "Troubleshoot" > "Additional troubleshooters".
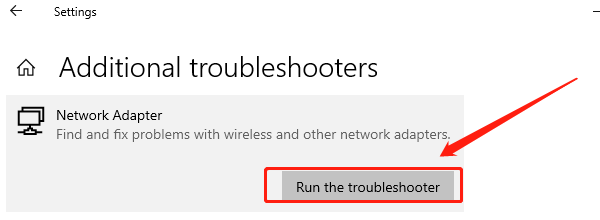
Under the "Network Adapter" section, click "Run the troubleshooter".

Follow the on-screen instructions to complete the troubleshooting process.
6. Use System Restore
In the taskbar search bar, type "Create a restore point" and open it.
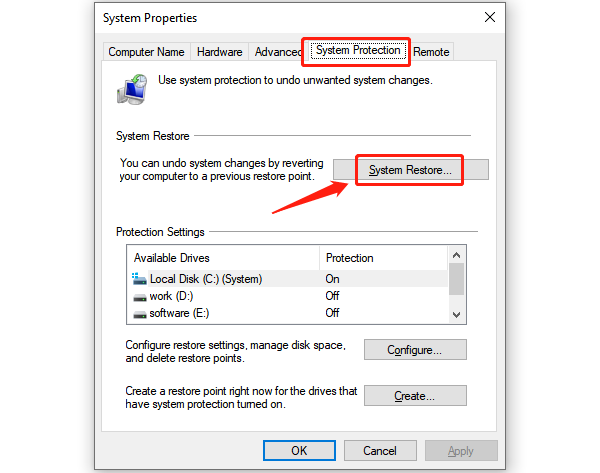
In the "System Protection" tab, click "System Restore".

Select a restore point created when the wireless adapter was working correctly, click "Next", and confirm the operation.
Your system will restart and restore to the selected point. Check if the adapter is now functional.
Follow these steps to diagnose and fix a missing wireless adapter in Windows 10. If the issue persists, contact technical support for help.
See also:
6 Ways to Fix Windows 10 Missing MSVCR120.dll Error
How to Fix the Windows 10 0x800f0922 Update Error