In Windows 10, achieving better audio quality is a common goal for users, highlighting the importance of optimizing your sound card settings. This article provides a guide to enhance your Windows 10 sound card settings for clearer and richer sound.
1. Update Sound Card Drivers
Sound card drivers are the bridge between the sound card and the operating system. Outdated or faulty drivers may cause audio issues. It is recommended to use Driver Sentry for automatic driver detection and updates, saving time and avoiding the risk of installing incorrect drivers.
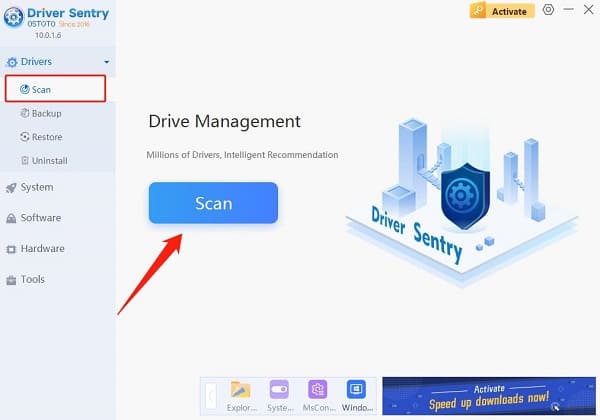
Click the download button to get the latest version of Driver Sentry. After installation, open the software and click "Scan".

Once the scan is complete, it will show which drivers need installation or updates. Find the sound card driver in the list and click "Update".
After the update is complete, it is recommended to restart your computer to ensure the updated driver works properly.
2. Enable Audio Enhancements
Right-click the volume icon on the taskbar and select "Sounds".
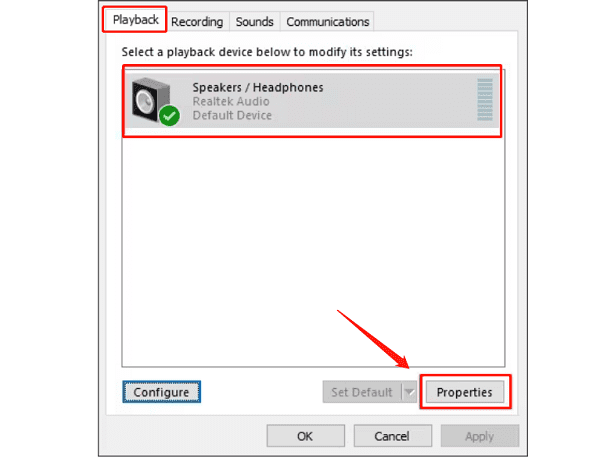
In the "Sounds" window, switch to the "Playback" tab.
Find the audio device you are using (e.g., speakers or headphones), then select "Properties".

In the device properties window, switch to the "Enhancements" tab.
Check the enhancement options you want to enable, such as "Equalizer", "Bass Boost", or "Virtual Surround".
Once configured, click "Apply" and confirm the settings.
3. Adjust Volume Balance
Right-click the volume icon on the taskbar and select "Open Sound Settings".
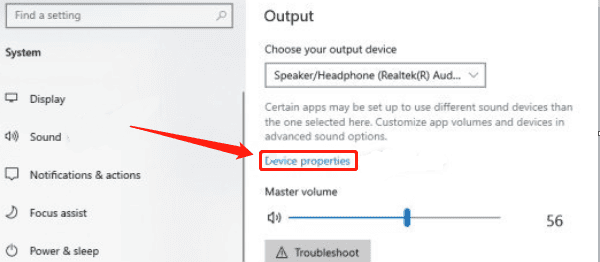
On the "Sound" settings page, click the "Device Properties" next to your active output device (e.g., speakers or headphones).

In the "Device Properties" window, click "Additional Device Properties" on the right.
In the pop-up window, switch to the "Levels" tab, then click the "Balance" button.
In the balance settings window, adjust the left and right channel volume sliders to be consistent (usually set to 100).
After adjustment, click "OK" to save the settings.
4. Optimize Microphone Settings
Right-click the volume icon on the taskbar and select "Open Sound Settings".
In the "Sound" settings page, scroll down to the "Input" section and find the microphone device you are using, then click "Device Properties".
In the device properties page, you can adjust the microphone volume. It is recommended to set it at a moderate level to avoid being too loud or too quiet.
If your microphone supports it, you can also check the "Enhancements" option to enable "Microphone Boost" for improved audio quality.
Once the settings are complete, click "Apply" and save.
5. Enable Spatial Sound
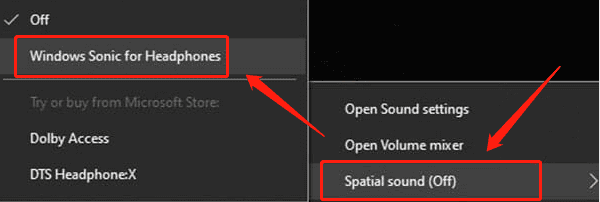
Right-click the volume icon on the taskbar and select "Spatial Sound" from the pop-up menu.
In the drop-down menu, select "Windows Sonic for Headphones" or "Dolby Atmos for Headphones" (Dolby Atmos requires the installation of a related app).

Once selected, spatial sound will be enabled immediately, and you can test its effect by playing audio or video.
6. Regularly Clean Audio Device Ports
Use a soft, dry cloth to clean the headphone plug, ensuring the surface is free from dirt or oxidation.
Use a blower or soft brush to clean the device's audio port, gently removing dust or debris to prevent blockage.
After cleaning, reinsert the headphones or audio device into the port and check if the connection is working properly.
By following these methods, you can easily optimize your Windows 10 sound card settings to improve the overall audio experience. Regularly cleaning the audio device ports can also help maintain the device's performance over time.
See also:
7 Ways to Maximize GPU Performance
How to Fix Wireless Mouse Connection Failure